Saturday, April 30, 2016

Black Pepper and Oregano Frico (cheese crisps)

Oh my goodness it's been a couple of weeks since I've posted anything new...sometimes life just gets way too crazy, so I'm extremely happy to have a quiet couple of days this weekend.
I've been playing around with Frico, which are basically just grated cheese crisped up in a pan or in the oven. The oven saves a bit of time over doing them one at a time on the stovetop, but I suppose you could make more than one at a time in a pan if you did them small like this. You can buy them at Costco or Whole Foods, but if I go to Costco I'll buy a bunch of other stuff I don't need and WF sells them for $7.99 for 3 ounces. I'll stick to making them at home!

I tried a few different kinds of grating cheeses, Parmesan, Romano and Asiago, and while they taste a little different, they all make really great little snacks. Mixing them tastes really good, too.
Plain Frico is great, the perfect one-ingredient recipe. But I decided to try it with oregano first, and then added black pepper, too. Cut the rinds off of the cheeses you use and save them for making soups and stews (but throw away the wax part if there is one, of course). You can use pre-grated cheese, but the texture might be off a little depending on what additives they put in the container.

For about 20 small Frico, pre-heat the oven to 375 and use:

  • 2 c grated Parmesan, Romano, or Asiago
  • 1/4 tsp freshly grated black pepper
  • 1/2 to 3/4 tsp dried oregano 

For every cup of grated cheese, use 1/8 tsp black pepper and 1/4 tsp oregano. 

Line a baking sheet or two with parchment paper or a Silpat thingy. I have two of those, but my cleaning goddess thinks they look nice on top of the rolling dishwasher, where I keep a lot of my small appliances, so I'm leaving them there for now.

Use a tablespoon to put little mounds of the cheese and spices on the baking sheet. Press down on the mounds to make them even and space them out a little. Pop them in the pre-heated 375 degree oven and set a timer for 5 minutes. Check to see if they're evenly golden brown, and if they're not, put them back in for another minute. Repeat the checking. If there's a little white left, those spots will be more chewy than crispy, but I kinda like that. The one on the right had a little chewy area. Yum.
The pic above is of some larger ones I made. You can shape the Frico like these by putting them over something round like a rolling pin immediately when they come out of the oven, or just let them cool in their flat shape. When they're cool, enjoy them for a mid-afternoon snack or with a cocktail! This little guy liked the plain ones I took to the picket line on Wednesday!


Sunday, April 10, 2016

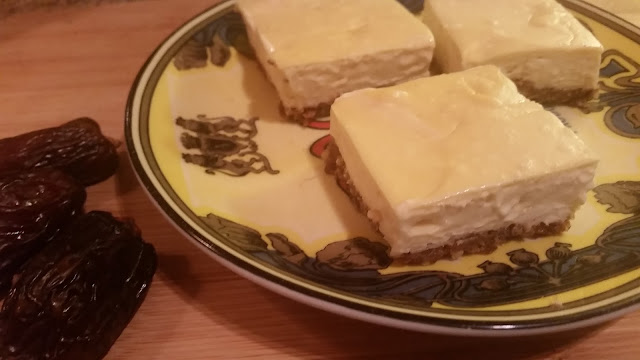
Maple Pecan Cheesecake Bars

I've been tinkering with this one for a couple of weeks now, and it's a really lovely and comforting (co-worker approved) treat without too much sugar added. It does require a few hours of refrigeration to set up, like any cheesecake, but apart from that it's very simple to put together. 

There are just a few ingredients: pecans and dates for the crust, and cream cheese, sour cream, maple syrup, vanilla, and one egg for the filling. 

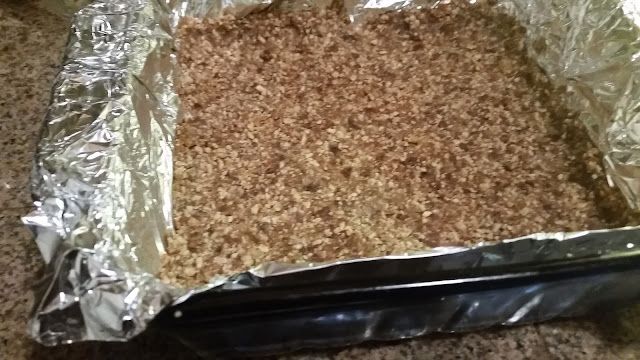
First, bring the cheese, cream and egg to room temperature. Pre-heat the oven, then start the crust. Put one cup of pecans (toasted or raw, but no salt added) 1/3 cup pitted dates, and a tiny pinch of salt into a food processor. Start by pulsing and then press on until it's all evenly ground together. This should just take about a minute or two. Line an 8x8 inch baking pan with a piece of foil big enough to hang over two edges (you'll use this sling to take the bars out of the pan later) and press the mixture evenly into the foil liner. Press it a little up the edges, too. Set aside until the filling is ready.

Now, the filling: Put 1 1/2 pkgs cream cheese (12 oz) into a mixer or a bowl and stir a bit. Add 2-3 Tbsp sour cream and 1/4 cup maple syrup and mix until combined on medium-low. It's important to not over-beat the cream cheese. It's ok if it's a little lumpy looking--the lumpy bits will melt into the rest. If it's over-beaten, on the other hand, it'll be lumpy when it's cooked. 

Add the egg and 1/2 tsp vanilla and beat just until mixed in well. Spread evenly over the crust (an offset spatula woulda been perfect for this, but the silicone scraper was already covered in batter, so why dirty something else?) and put in the 325 degree oven for about 25 minutes, just until set on top. Let cool at room temp for one hour, um, somewhere your pets can't get to it and sneak little bites when they think you're not looking, and then refrigerate for 3 hours or overnight. 

Remove from the pan, using the foil sling, and cut into pieces. Serve as is or with a cup of coffee. Most of all, enjoy the treat! 


Saturday, April 2, 2016

Hearty Meatball and Veggie Soup

Living by myself and loathing kitchen cleanup as I do, I'm always a fan of a one-pot meal. This checks all the right nutritional boxes, too: protein, healthy carbs, natural fat and lots of veggies. It takes about an hour total and serves four generously. 

With the butternut squash, it hits the ratios for Always Hungry Phase 2. Without them, it's almost exactly phase 1, and leaves you a little room for a little sour cream or parmesan.

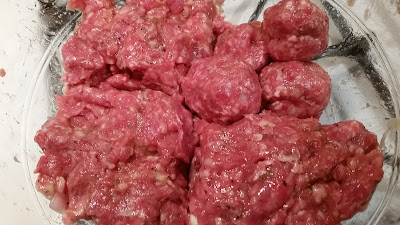
For the meatballs, use 1 lb of 85/15 ground beef, 1 egg (beaten before adding), 1 Tbsp chickpea flour, 1/2 tsp each of granulated garlic, salt and oregano, and 1 small diced shallot (about 1-2 Tbsps).

Feel free to play with these ingredients. Use turkey or veggie meatballs if you like, or all-purpose flour, or fresh garlic.  

To form even-sized meatballs you can use a scoop, but I find it kind of a pain to clean mine well so I'd rather not use it for raw meat. Instead, I divide the meat into four parts and then divide each of those parts into four meatballs. Next time I think I'll make them even smaller.

Next, you gotta brown the meatballs to make a nice little crust to keep the flavor in them in the soup. Put a teaspoon of olive oil in the pan and brown them on as many sides as you have patience for! I usually only do two or three "sides". Remove them from the pan and set aside.

I saved a little time by sauteeing the meatballs in this pan and the onions in the soup pot, then sauteeing the other veg in the yummy bits from sauteeing the meat. 

Usually I do it all in one pot, layer by layer. 

Saute one medium onion, diced, in 2 tsp olive oil in a heavy Dutch oven or stock pot.
Saute 2 cups of chopped vegetables in the other pan, or add to the onions if using one pot. Leave in the yummy bits from the meatballs either way. I started the mushrooms before the zucchini to get them a little more brown.
Add 1 14 oz can of crushed tomatoes to the onions and stir in the other vegetables if they're separate. Fill the can halfway with water and put the water in the pot. Bring to a simmer for about five minutes.

If you have a piece of Parmesan in the fridge, cut the rind off and toss it in with the tomatoes. It'll add lovely flavor to the soup.
Rinse and drain one can of chickpeas or your favorite beans (about 1 2/3 cups). Add to the veggies. Next, add 5 cups of chicken or veggie broth, homemade or low-sodium from the store. 4 cups plus one more cup of water would also work, especially if you just want to buy one box of broth.

Bring the soup to a boil and then add the meatballs and 1 cup cooked diced butternut squash (if adding raw, cook until soft with the other veggies). Simmer for 5-10 more minutes, until the meatballs are cooked through. Serve by itself or with a little parmesan sprinkled on top.  If you make 16 meatballs, put 4 in each serving.