Thursday, February 26, 2015

Vietnamese Coffee Truffles

OK, so wha happen wuz...I got an email this morning about SF Chocolate Week, which is coming up, and I started thinking about my favorite things from last year's Chocolate Salon. All day I was thinking about how to make some Vietnamese Coffee Truffles like the ones the amazing ladies at Socola make. These look more like actual truffles dug up by special pigs than Socola's beautifully enrobed delicacies, but boy-oh-boy do they hit the spot! This is a small recipe that yields about 15 truffles, but it could easily be doubled.

If you've never had Vietnamese coffee, run out and get some, STAT. It's strong coffee mixed with sweetened condensed milk. The mix of bitter, sweet, rich and creamy is out of this world.

These are the ingredients for the truffles. I rolled them in a mix of unsweetened cocoa, powdered sugar and a hint more espresso powder, too.

1/3 c heavy cream
6.4 oz very dark chocolate (this is 77% but anything from 70-90% is probably good. The condensed milk is sweet, so the chocolate should be on the bitter side of bittersweet).
1/2 c sweetened condensed milk
1 Tbsp espresso powder
Chop the chocolate finely with a serrated knife and transfer to a glass or other heat proof bowl. Pardon the blurry photo - I was excited and it's a miracle any of them came out!

When you're done chopping, heat the cream, condensed milk and espresso powder in a small pan over medium heat, stirring to combine. Watch carefully - you want it to just come to boiling, and when it does it may boil over quickly.

Pour the cream mixture over the chocolate and stir stir stir with a whisk or wooden spook like your life depends on it for a minute or two, until the mixture is smooth.

Refrigerate the bowl for 30 minutes to an hour - if you refrigerate too long and it hardens up, you'll break your scoop like I've done once. Or twice.

If you want to roll the truffles in cocoa, prepare a medium bowl with unsweetened cocoa, some powdered sugar and a teeny bit more espresso powder.

Using a small scoop or a tablespoon, scoop out the chocolate into small balls. Use your hands to help shape them - they'll be a little soft.

Drop the truffles into the bowl of cocoa. Swirl the bowl around to cover them all over.
Using a skewer, a fork or a spoon, transfer each truffle onto a wax paper lined plate or into a mini cupcake/candy cup.

Refrigerate the soft truffles for another hour so they set up. You may want to take them out of the fridge a few minutes before serving for best flavor.

Sunday, February 22, 2015

Empanada Pastry (Masa para empanadas)

Some of you asked right away when I mentioned I was starting a blog. "Will you do empanadas?" Well, of course! Many many moons ago I was an exchange student in Argentina. When I first got back, my host sisters (who were in the States) and I tried to make empanadas with some kind of dough from a can. We failed miserably because it was completely the wrong texture. From then on, I was on the hunt for a recipe that would work consistently. Standard pie dough made from flour, butter and water tastes good, but isn't quite pliable enough. Fillings posts to follow soon!


In 2003, when going through Thanksgiving food magazines with my then-BF, I found it:
Cafe Azul's Masa Para Empanadas.  I failed to write down which magazine it was from or where Cafe Azul is, but I still have the now very tattered piece of paper I wrote the recipe on. Since then it has become easier to find the pre-made, frozen dough that most Argentines use, tapas para empanadas, in the US. It's often found in Italian delis like Lucca in San Francisco. But when you have a recipe this good and you've got the hang of the rolling pin, why not make the real deal? It makes 24 big empanadas, but I usually make them smaller for parties, so I get around 40.

Ingredients:
  • 5 cups flour
  • 1 lb cold butter (I know, I know. It's party food).
  • 1 Tbsp fine salt
  • 1 large egg
  • 1 Tbsp white vinegar (champagne, white wine or rice vinegar, or maybe distilled in a pinch). 
  • cold water
1. Mix flour and salt in the bowl of a 10-cup food processor or a stand mixer (or a large bowl if you plan on mixing by hand).

2. In a 1 or 2 cup measure, mix egg and vinegar with a fork. In another measuring cup or a glass, put some ice cubes in a cup of water and set aside to chill. 
3. Remove the butter from the fridge just before cutting it up into little pieces (three to four cuts lengthwise and eight to ten cuts crosswise is good).

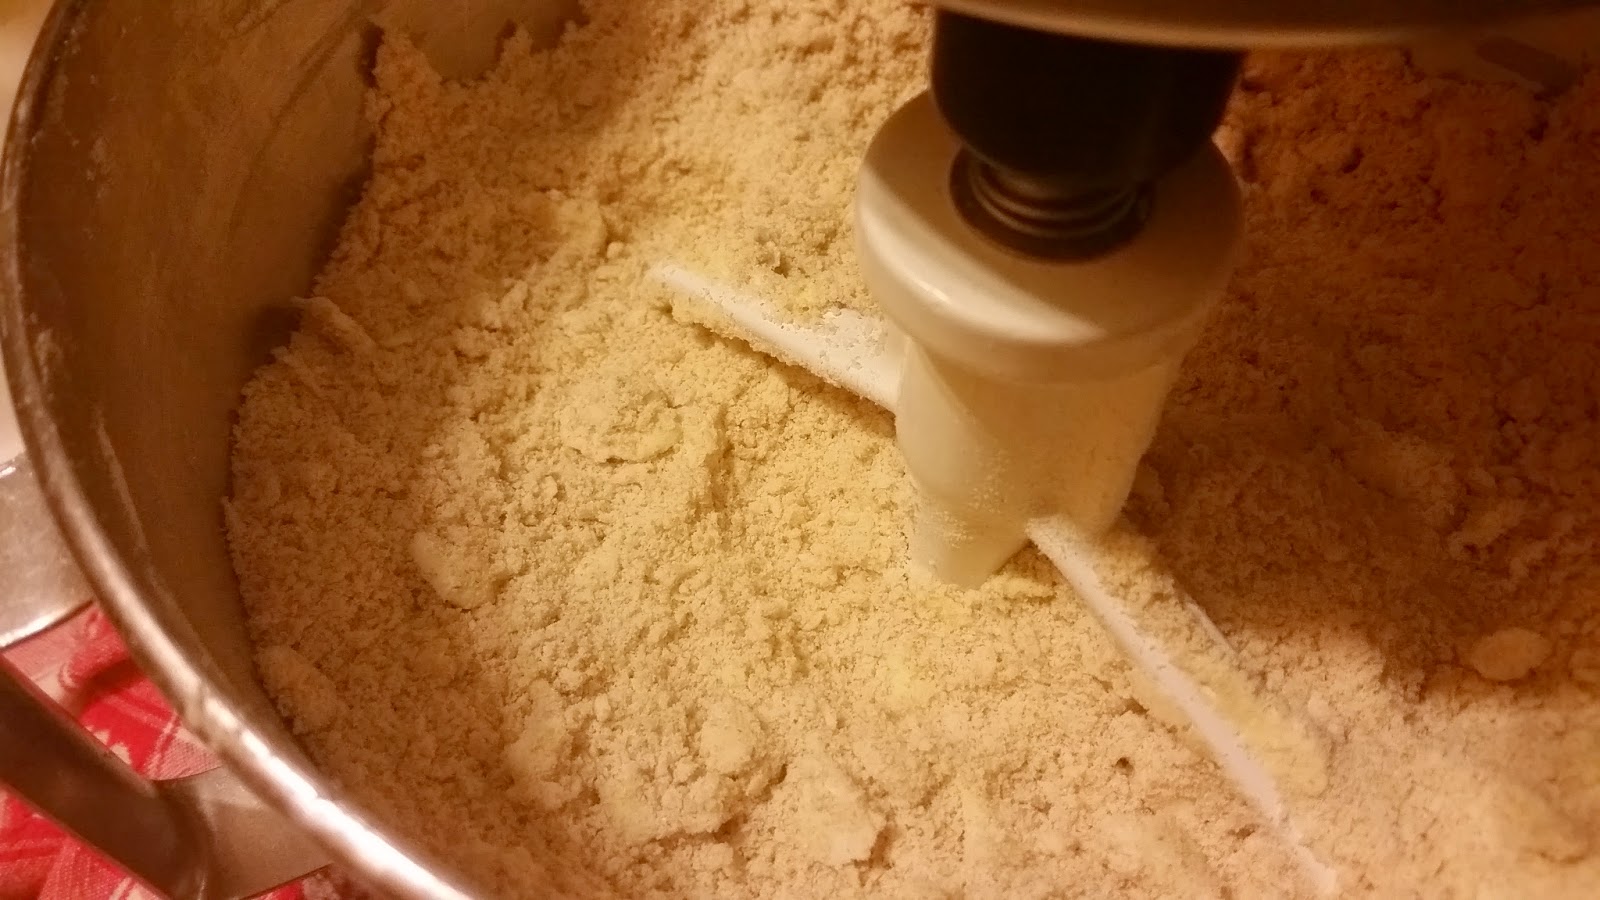
4. Add the butter to the bowl of flour. Follow the directions below for your method, blending until it looks like the picture by number 5. 
For hand mixing: cut butter into flour with a pastry cutter or a couple of knives. You can help it along with your fingers, but pop it back in the fridge for a couple of minutes when you're done if you do that. 

For the food processor: use the pulse button to blend the butter into the flour. 

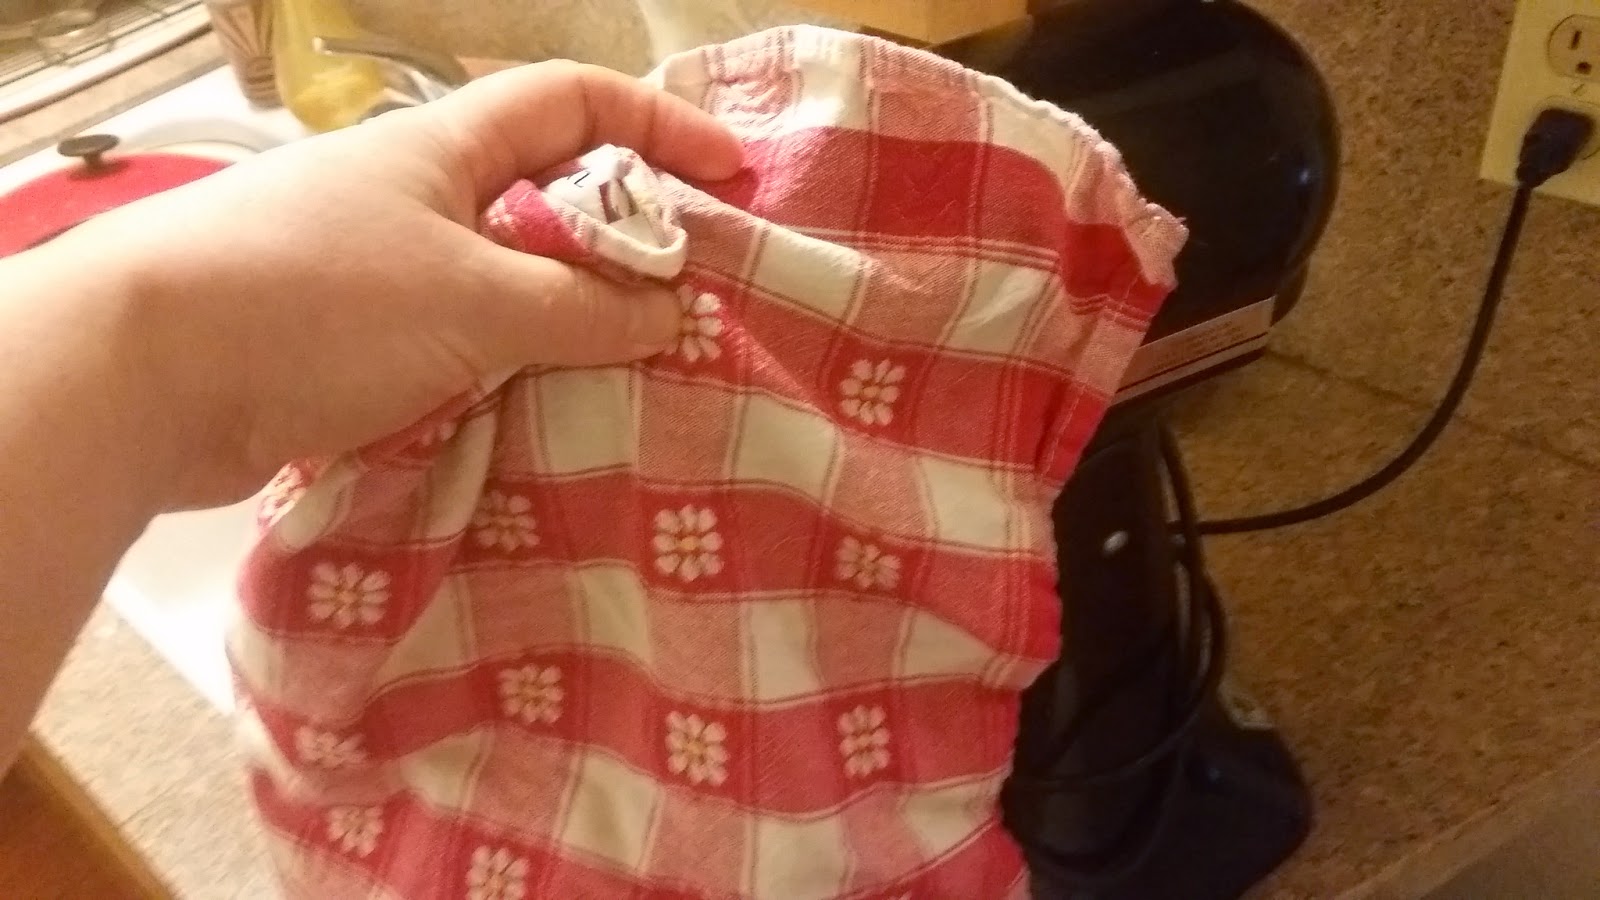
For the stand mixer: cover the mixer with a clean dish towel as above to keep the flour from getting all over your kitchen. Turn the mixer on the lowest setting. Take away the towel after about 30 seconds.

5. When the butter is blended in, it will look like this. The color of the flour will have changed a little, and most of it will look like damp sand. Small pieces of butter that are still visible are good - they'll make the pastry nice and flaky. 
6. Add enough of the ice water to the egg and vinegar mixture to make one cup total of liquid. I use a strainer to keep the ice cubes out because if I don't, I usually end up dumping in too much water. If you have a steadier hand than I, you don't need it. 
7. Add the liquids to the flour mixture. Mix -just- until the dough comes together like so. If you see some small butter spots in the dough, that's good. 
by hand: mix with a wooden spoon
food processor: start with pulses and then turn on high
stand mixer: cover with towel again for first few seconds, mix on lowest setting. This took just under a minute. 

 8. Lay out a large piece of parchment or waxed paper. Pat the dough out into a large rectangle, approx. 9" x 15" but I've never measured mine.

Pushing up from underneath with the paper, fold each of the long ends of the dough over the middle and press down gently.


Now the dough has to rest in the fridge for 30 minutes (or overnight if you want to roll it out the next day). Wrap the dough in plastic wrap, or if you're morally opposed to plastic wrap (I'm getting there), wrap it tightly with the paper and cover with recyclable aluminum foil or a slightly damp dish towel to keep it from drying out.
Take a third of the dough out of the fridge. Put the rest back in the fridge to stay cool. 
Put flour on a large cutting board or clean piece of counter space liberally. Put down dough and flour that, too. Start rolling by pushing the rolling pin down into the middle of the dough - this will help it roll out more evenly. Roll to about 1/8" thick, then cut circles with a biscuit cutter, cookie cutter or anything straight sided. This cutter is about 4 inches round. Don't fret too much if not every piece is exactly the same. You'll roll each circle once more quickly before filling. 
Repeat the process with each third of the dough, refrigerating the cut circles in between. Set up the cooled filling(s), a sheet pan, a ramekin of water and a ramekin with one beaten egg to brush the tops with. Give each circle one more quick roll to thin it out and make it more pliable, then put filling in the center. Dip a finger in the water and wet the outer edge of one half the circle to help it stick together. 
   
filling of mozzarella, sauteed onions, provolone and oregano
Fold the pastry over and press it together with your fingers. Then press it again with the tines of a fork. This is the simplest way to seal the empanada, but if you make more than one kind of filling you'll have to learn more seals so you can tell which is which, as below!


Brush the egg over the tops of the empanadas to help them brown. Bake at 400 degrees for 20 to 25 minutes. Remove from the pans after a minute and let cool on cooling racks. And there you have it!


Monday, February 16, 2015

Billionaire's Shortbread

Billionaire's Shortbread - a fancy name for delicious layers of buttery shortbread, caramel, and chocolate. 'Twould be just Millionaire's Shortbread, but making the chocolate layer a ganache and the addition of fleur de sel (flaky salt), and other toppings takes it up to the next level.


There are three stages to making this, since each layer needs to cool. You could do one layer a night if you want to do this during the week, or just do the whole thing between spurts of housework or binge-watching. I recommend leaving a few hours between caramel and ganache to allow the caramel to really set up, but the 45 minutes suggested below will do as well.

Part 1: Shortbread
  • 2 sticks COLD unsalted butter, cut into 8 pieces each
  • 1 1/2 cups of all-purpose flour
  • 2/3 cup granulated sugar
  • 1/2 c fine cornmeal (not polenta)
  • 3/4 tsp salt
Preheat the oven to 350 and prepare a 9" x 13" pan with buttered parchment paper (butter side up).

You can just grease the pan itself, but if you line it with parchment paper or aluminum foil and butter that, it'll be much easier to cut the final product into pretty bars when all the layers are done. 

Put the ingredients into a food processor and pulse until they form a dough. This itty bitty food processor (because I have an itty bitty kitchen) couldn't handle all the ingredients, but a regular size one will. If you don't have a food processor, you can use a pastry cutter to work the butter into the other ingredients and then finish it off with a wooden spoon. If you do it the hard way, imagine yourself in the Downton Abbey kitchen with Daisy and Mrs. Patmore. Can you believe I forgot to watch last night? Thank goodness for the DVR. 

I dumped the whole thing into my stand mixer with the paddle and watched it carefully to make sure I didn't over-mix it. The dough will look like this when it has come together - stop mixing as soon as it all comes into a big clump. 

Pat the dough into the pan with your fingers. Get it as even as you can. 

Trim the paper so it still hangs over the edges but doesn't quite stick out this much. 

Bake at 350 for 25-30 minutes until nice and golden. This is a touch pale in the middle, but it will keep cooking for a few minutes when you take it out of the oven. Remove from the oven and let cool completely, at least an hour. Letting it cool will give it the crisp, crumbly texture you want in a shortbread. 

Part 2: The Caramel

The caramel is the trickiest part. It requires some focus and patience. Brew yourself a nice cup of tea to sip while you make it. Or pour a little nip. 
  • 2 sticks unsalted butter
  • 1 cup heavy cream
  • 3/4 tsp regular table salt or 1 tsp Kosher salt
  • 1 3/4 c granulated sugar
  • 1/4 c corn syrup
  • 1/4 c water
Melt the butter and salt into the cream in a small pan over low-medium heat. Make sure not to boil this...if it starts to simmer, turn it down a smidge. 

Put the sugar, corn syrup and water into a medium pan. Note: the corn syrup is Karo syrup, less nasty than the high-fructose variety in junk foods. You can replace it with more sugar, but it's your Caramel Insurance Policy. I had to throw out two batches and start over when I tried to do this with just sugar because it crystallized on me! It helps ensure that your caramel will work and you won't be throwing out tons of perfectly good sugar. 

When it starts to look like the above right photo, swirl a little from time to time but do not stir. Keep a close eye on it as it gradually changes color. Sip your tea and hang in there for 5-15 minutes. 

When it gets to the lovely brown color below and -just- barely starts to smell like burnt sugar, turn off the heat and CAREFULLY stir in the cream mixture. 


Turn the heat back on to medium, medium high and cook a few minutes more, stirring often. If you have a candy thermometer, stick it in now - you're aiming for 230 degrees. If you don't, watch for the color change below. When it's 230 degrees or this beautiful brown color on the right, pour it over the shortbread. Chill for 45 minutes. 
Part 3: Ganache!
  • 12 oz 70% dark chocolate
  • 1 cup heavy cream
  • 2 Tbsps coffee liqueur or strong brewed coffee (optional)
  • Toppings: a little flaky sea salt (fleur de sel) and pretzel pieces (or mini marshmallows, or whatever makes you happy with chocolate. Crisp bacon bits?)
Chop the chocolate finely with a serrated knife. Nobody told me to use this kind of knife for the first few years I was making ganache - it really really helps! If you don't have one, a regular knife will do. Bring the heavy cream and coffee to a simmer that's ALMOST a boil, but don't scald it. Pour the cream over the chocolate and stir stir stir with a wooden spoon or a whisk. Now you have ganache! Pour it over the caramel layer. 


Put the ganache in the fridge for a few minutes before sprinkling the sea salt on top (otherwise it will dissolve in the warm chocolate). Remove while still not set up and sprinkle the sea salt and any other toppings you like over the ganache. Return it to the fridge for another 30 min - 1 hour. When the ganache is set, gently pull the whole thing out of the pan by the parchment paper or foil. Place it on a cutting board and slice pretty squares. The uneven bits on the edges can be chef's snacks :-). Keep in the fridge and bring to room temp before serving if you can bear to wait that long. I'm going to pack most of this up to take to the office tomorrow, and then I'm off to the Y for some calorie-burning cardio! 


Friday, February 13, 2015

Ginger Rotisserie Chicken Jook (aka Rice Porridge or Congee) Total time 2 1/4 hours, active time about 30 minutes)   


I was having a little trouble figuring out what to post this week, but then my friends at yourfoodchoices.com posted a beautiful whole grain congee with made from scratch chicken broth, Mei Lin won Top Chef with a congee, and my sinuses really started acting up. Given all these signs and the upcoming Lunar New Year, it seems to be time for some comforting, healing Congee/Jook!

Congee is one of a few names for a traditional Chinese rice porridge, sort of the equivalent of  chicken noodle soup. I call it Jook, the Cantonese name, in honor of the ESL students I teach in SF's Chinatown. It's perfect for breakfast, lunch or dinner, a snow day, a sick day, or just any time you want some comfort. 

Jook can be made with pork, beef, abalone, hundred-year eggs, or just about anything. If you like to buy rotisserie chickens, it's a great way to use the bones and a good amount of the meat. You can use broth, water, or a combination of the two. I use a combination. 


Busted! I can't help but eat a piece of the chicken while it's still hot and yummy.  It's best to make broth from scratch. But if you aren't feeling so hot or you have a busy weekend, you can cheat a little with a 32 oz box of low-sodium chicken broth. Be sure to get the low sodium, not the reduced sodium. As of the last time I checked, Whole Foods and Trader Joe's carry it for the same price. 


Remove the meat from the bones. Shred half the meat for the congee and set aside the other half for sandwiches or chicken salad. 

Roughly chop two carrots, one stalk of celery and one small onion or large shallot. Add to a large pot with the bones and broth. Starting on low heat and turning it up after a few minutes, bring to a boil and reduce to a simmer. 


As the broth comes to a boil, you'll start to see some white foamy stuff. This is OK. 

If you see grey clumpy stuff, be sure to strain or spoon that off before it breaks up into the liquid again. This is schmutz from any bad stuff that might be in the chicken, and you don't want it in your Jook. It's not the end of the world if you miss some, but get as much out as you can. 

Simmer for 30 min to 1 hour. 


Strain the broth into a 5 to 8 quart pot. Compost the bones and veggies (or compost the bones and mash the carrots with a little salt and butter for a chef's snack).


Add a one-inch piece of ginger. You can peel it if you like. I find it easier to find and fish out if the peel is still on. 


Add one cup of long grain white rice. Short grain rice will make it gummy. If you prefer brown rice, add 15-30 minutes to the cooking time. Add six cups of water for a total of 10 cups of liquid. Bring to a boil and skim off as much of the white or gray foam that rises to the top as you can this time. Simmer for 90 minutes, stirring occasionally. 


If you're wondering if you read that right, yes, that was 10 cups of liquid to one cup of rice! The rice will break down a bit but give a nice texture to the dish. After about 60 minutes, check for salt. If you think it needs it, stir in 1/4 tsp at a time, checking after each addition, until it's just right for you. 


Then, prepare your condiments. My favorites are scallions and cashews. Chop one scallion (green onion) for each bowl you plan to serve. I've chopped four to set some aside for tomorrow. Toast some raw cashews or peanuts in a dry pan over medium heat for a couple of minutes until they get some brownish spots and give off a light fragrance. 


Other possible toppings include cilantro leaves, a soft-poached or hard-boiled egg, fried shallots, Chinese sausage, pickled ginger or radish, or rousong (a yummy pork product - I won't gross you out with the English name). 


Put some of the shredded chicken into each bowl you're serving. Ladle the Jook over the chicken and sprinkle with cashews, scallions and a drizzle of sesame oil. 

Enjoy the comfort!


Saturday, February 7, 2015

Valentine's or Singles Appreciation Day Cheese Souffle

Souffle? Really? Isn't that, like, super hard? Actually, it's not that hard, it just requires a little attention to detail. It's a lovely way to do something nice for yourself or for your sweetie. You're worth it! I'm incredibly lucky to have met a wonderful couple who hosts a Valentine's dinner for a group of couples and singles. Everyone brings school-style valentines or other sweets and treats for all, bringing back the warmth and love I think the holiday should be about. But most people are left to figure it out for themselves, producing a lot of anxiety. Why not make a special meal at home?


This recipe is for one or two people - a meal for one with a salad or a meal for two with a salad and another side. It should take about 20-25 minutes to prepare (once the eggs are room temp) and 20 min to bake.

The two key things to remember are:
  • Let the eggs come to room temp before starting for maximum poofiness - the old way is to take
    them out of the fridge an hour ahead on a warm day, two hours ahead on a cold day. The quick way, thanks to my good friends at yourfoodchoices.com below, is to put the eggs in warm but not hot water for 5-10 minutes. If you just can't even because you're concerned about food safety, you can still make the souffle. It just won't be as floofy and poofy. Some may argue that those words aren't English, but I stand by them :-)
  • Once you put it in the oven, don't open the oven for the first 15 minutes. If you open the oven before that, it will fall. 
And even if you do mess up on one of these fronts, you'll still have something delicious to eat. It might not be Instagram-worthy, but this is about doing something nice for yourself.  You can rarely go wrong flavor-wise with eggs and cheese. 

Ingredients: 
1 Tbsp butter (1 tsp for ramekins, 2 tsps for roux)
1 Tbsp flour
1 Tbsp or so bread crumbs (or a crumbled up saltine)
1/3 c milk (whole if you have it, but 2% or skim will do)
a tiny pinch of paprika and/or one grating of nutmeg
1/4 tsp ground dry mustard (you can omit if you don't have any, but it's a nice touch)
1 large egg, separated
1 large egg white
1/3 c grated flavorful cheese (sharp cheddar, Gruyere, or even Asiago)
Note: it's best to grate your own cheese, but you can buy the pre-grated stuff if you like. Just give it a quick chop with a knife before mixing it in, since the industrial-size shreds are usually a little longer than the ones you make at home. 

Since you're doing something special, 
I hope you'll splurge on some nice pastured eggs from a good market or a farmer's market. They really taste better, and eggs are the star of this dish. You may even get a cute little newsletter about what the chickens are up to. Regular eggs are fine if that's not in your budget right now. It's an indulgent kind of day, so why not choose the old-school way of warming them up and take a bath or binge-watch a couple of episodes of Miss Fisher in the meanwhile?


When the eggs are room temp or as close as they're gonna get, pre-heat the oven to 425 degrees and get started!

1. Prepare two 4 to 6 ounce ramekin(s) or one 8 ounce ramekin.  If you don't have them, they're sold everywhere from Target to Sur La Table these days. If you never make a souffle again, they're handy for lots of other things. They should be at least 2" tall. Rub 1/2 tsp of the butter into each, then put 1/2 Tbsp bread crumbs into each. Roll the ramekin around until the bread crumbs coat the inside fully, then shake out any excess.


2, Melt the remaining 2 tsps butter over medium heat in the smallest pan you have. It'll probably be bigger than this one. If you're in doubt about the heat, make it lower since it's such a small amount. When it bubbles, add the 1 Tbsp flour and start whisking immediately.


3. Whisk and cook for about a minute, until it's smooth and a little bit gold-ish. What you have now is a roux, which is the basis of a whole lotta dishes from gravy to gumbo.


4. Add the milk - it'll look lumpy for a second or two. Keep whisking quickly until it's smooth and thickened.

Apologies for the blurry photo - whisking while snapping pics is not so easy!


5. Voila! Now that it's smooth, take off the heat, add and stir in the nutmeg or paprika, the dry mustard and a pinch each of salt and pepper. This is now a bechamel or white sauce. Did you know you could make that? Let it cool for a couple of minutes before you stir in the yolk and cheese.


6. When it's still warm but no longer hot, add the egg yolk and whisk really quickly so it doesn't have time to scramble the yolk. Add the cheese and stir until smooth. Transfer the cheese mixture to a medium bowl. It'll look a little ragged like this, but whisk a little longer until it's smoother.


7. Put the egg whites into another bowl or the stand mixer bowl. Beat on medium until they get frothy like this, one minute or so depending on your mixer. Then turn it up to high and beat another minute or two to stiff peaks. It's at the stiff peaks stage when you pull out the beaters and the tip of the whites that pull up don't flop over. See the nice stiff peak below?
8. Fold the beaten whites into the cheese mixture. Start by folding in 1/4 of the whites at first to lighten it, then add the rest and fold gently until it's all a consistent color with no white streaks. 


9. Pour into the prepared ramekin(s) and bake on the middle rack of the oven, 20 minutes. If you needed the second ramekin but only want one, you can refrigerate that, then let it come to room temp before baking tomorrow. Remember, don't open the oven for the first 20 minutes!! I'm lucky to have a functioning oven light so I can peek through the window.  The outsides will be a nice dark brown. This one puffed over a little bit rather than up, but it's still light and lovely inside.  Serve immediately and pat yourself on the back. You have conquered the legendary souffle!