Sunday, September 13, 2015

Le Dîner en Blanc SF, 2015

One day 25 years ago, a group of friends got together in Paris, dressed in white, set up tables and chairs, and had an elegant picnic. Today, they're holding similar events across the globe. Last night was the annual event in San Francisco. The U.S. organizers are a group called Handmade Events - www.handmade-events.com


The location is kept a secret until a few hours before the event, but we got a couple of hints that it would be in Golden Gate Park. Our first thought was, "brrrr!" since it was a foggy day, but it turned out to be lovely and warm and in the gorgeous Music Concourse between the DeYoung and the Academy of Sciences.


Being the competitive picnickers that we are, we started planning a month in advance. Here was our final menu, printed up by the lovely and talented Lesly!

Lesly also made me my very own feathered mini top hat - I love it!

We met at Maren's Hidden Cottage to box up salads with grilled peaches, blueberries, arugula, goat cheese and pecans, courtesy of Darcie and Amena...

Did I mention, grilled peaches?

Into the big boxes went Maren's yummy and hearty double decker summer vegetable frittata stacked with cream cheese and smoked salmon...

 ...and my potato salad made with carrot-top parsley pesto, since we count many non-bacon eaters and at least one mayo-averse person among our numbers.

Some pieces of cute waxed paper from Daiso kept them from getting too shaken up en route.
This photo and the next two courtesy of Susan Mallon


Maren's delicious selection of cheeses was artfully arranged by Ana-Marie.


And then there were desserts:

My salted caramel pots de creme, which suffered from a bad bout of cooking juju I was having the night before. Some curdled and most didn't set up, but they still tasted good :-),

Steve's brown butter and honey madeleines, which were even better this morning with coffee,

and the highlight of the menu for me, Jason's white chocolate caramel popcorn with herbs de provence...out of this world.

Somehow we squeezed all of this between the beverage committee's wine selections (Thanks, Nil and Joe!) and the beautiful floral arrangements (accented with beautiful little birdies and feathers) created by Julie, Susan, Rosie and the rest of the decor team. Little battery-powered tea lights, strings of lights, and flashing "ice cubes" brought the table to life again after the sun set.


Photo courtesy Nil Isik - I mean, how gorgeous is that?


After all that, it was time to burn off a few calories by swingin' to Big Bad Voodoo Daddy in the Bandshell.

Other groups had some great ideas as well, like the Viking Ship team, the feather bouquets, and the group that made things easy on themselves and just picked up some KFC.


Friday, September 11, 2015

Saag Paneer in the Instant Pot Pressure Cooker

Ever since I was a little girl, my favorite vegetables have been cooked greens: spinach, Swiss chard, whatever. Naturally, when I discovered Indian food somewhere along the way, I fell in love with Palak Paneer (spinach with spices and Indian cheese) and Saag Paneer (mustard or other greens instead of all spinach). Since being diagnosed with an allergy to red/green/yellow pepper, I've been unable to walk past Indian restaurants and those pre-made foil packets at Trader Joe's without getting a little sad. 


I've searched for recipes online, but they all had a goodly amount of red or green pepper in one form or another, until finally I found this beautiful Saag recipe from myheartbeets.com. She only uses a little bit of cayenne, so much of the heat comes from the ginger and I felt confident enough to make it work despite my minimal understanding of Indian spices. And it's made in my nifty new Instant Pot! It was meant to be, I tell you. 

Further adaptation was required to incorporate the paneer and to make up for the fact that the (red pepper-free) Garam Masala I found at the market somehow didn't make it home with me. I had all the Masala ingredients individually, so I added the ones that weren't included already and bumped up the ones that were. 

Get everything together: 

1 lb spinach, rinsed well
1 lb mustard leaves, rinsed
2 Tbsp ghee, butter or oil
2 small onions
2-in piece fresh ginger
4 small garlic cloves
2 tsp salt
1 1/4 tsp coriander
1 1/4 tsp cumin
3/4 tsp ground turmeric
1/2 tsp cinnamon
1/2 tsp black pepper
Optional: 1/2 tsp cayenne, or more or less to taste (if you can't find or don't have fresh ginger, you can use 1/2 tsp ground)


for the paneer:
1 Tbsp oil
1 more tsp turmeric
1 pkg (about 14 oz) paneer (Indian cheese available at may markets and specialty stores)

Chop the onions and ginger and plug in the Instant Pot. Press the saute button. Once the display says "hot", add the ghee or butter and the onions and ginger, stirring occasionally until the onions are softened and getting translucent. 

In the meantime, mince the garlic and measure the spices into a cup. When they're ready to be added, move the onion/ginger mix to the side for a few seconds and let the spices hit the pan directly before stirring into the rest. 


Spices, salt and garlic ready to be added. 


Saute the spices and the onion for about a minute, then add the spinach leaves. Stir until they wilt enough to fit in the mustard green leaves. 

You could also do all spinach or all mustard greens, or replace some with kale or chard. 


You don't need to add any liquid. The liquid released from the greens will cook the whole thing. Miraculous, no? 

Press Keep Warm/Cancel to turn off the saute function, and then put the lid on. 

Lock the lid with the pressure valve turned to the pressure setting. 


Press the Poultry button (this piece of genius brought to you straight from Ashley at myheartbeets.com) and let the pot do its thing. 

In the meantime, cut the paneer into 1 inch cubes and toss with the Tbsp oil, 1 tsp turmeric and 1 tsp fine salt. Let sit for a few minutes, then saute on the stove just until golden. 

Let the pressure release naturally (push the Keep Warm/Cancel button when the time is up). When the valve lowers, remove the lid and puree the greens with a stick blender, a regular blender, or a food processor. If the greens are too watery, add some potato starch or a slurry of cornstarch and cold liquid to thicken it up a bit. 

Stir in the paneer and serve with basmati rice or whole wheat naan. If you enjoy it half as much as I do, you'll be very happy. 


Monday, September 7, 2015

Smoky Mac and Cheese in the Instant Pot Pressure Cooker

I've kinda been looking longingly at pressure cookers and slow cookers, but finding it hard to justify bringing ANOTHER gadget into my tiny kitchen. A couple of weeks ago, a very trustworthy friend posted a link to a deal on the Instant Pot, a pressure/slow/rice cooker and yogurt maker all rolled into one, and I took the plunge and bought it. I love it!

This is not a paid endorsement, just me sharing something I'm having fun using. As always, adjust according to your taste. You can use regular mozzarella or Monterey Jack if you don't like the smoky flavor. 


Since buying this thing, I have been having a blast at home and on the Interwebs. I've discovered truckers who cook on the road and blog or make videos, and I've found a recipe for an Indian recipe I've been sad to miss since the allergy diagnosis (post to follow soon).

A recipe for Pressure Cooker Mac and Cheese I found along the way piqued my interest, so I decided to work on that. Both this recipe and this recipe call for evaporated milk as a way around making a roux, but I've tried using that in recipes and I can always taste the canned flavor. Here's my adaptation of the linked recipes. 


Total time: about 25 minutes
Servings: 4 to 6

Put 3 cups (about 1/2 box) cavatappi or elbow macaroni in the Instant Pot with 3 cups water, 1 tsp ground dry mustard, and 1 1/2 tsp very coarse salt (no coarse salt? use 1 tsp fine). 


Lock the lid and set the valve to sealing. Push the manual button on the Instant Pot and reduce the time to 4 minutes. The four minutes is the time it cooks under pressure once pressure is achieved, in about 10 or 11 minutes. It will say "on" until it gets to full pressure, and then start counting down. 


While the pot is building pressure, grate 8 oz medium cheddar and 5 oz smoked mozzarella, preferably with the grater disc of a food processor. If you do this by hand, you might want to start before you put in the pasta. 

Add 1/2 tsp granulated garlic or onion powder, 1 Tbsp cornstarch, and 1/4 tsp or so black pepper to 3/4 c half and half. Give it a good stir so the cornstarch dissolves. 

You could probably use heavy or light cream, but milk may not "absorb" the cheese the same way. 


When the four minutes under pressure are up, use a chopstick or something similar to push the valve to venting and release the pressure (quick release). If a lot of white stuff comes up with the steam, close for a second and start again. 

Release steam until the silver thingy next to the valve drops. 


Open the Instant Pot and ladle out a little of the liquid, maybe 1/2 cup or so. This will help the sauce not be too runny and soupy. 


Pour in the half and half mixture and stir with a silicone or wooden spoon. 

Push the keep warm/cancel button, then push the saute button. Stir for a total of about 3 minutes, then turn off the cooker.

Stir in cheese, one handful at a time. If you stir in too much at once, you'll have big globs of melted cheese that don't combine into the sauce. Still yummy, but maybe not the texture you want! 

It'll be a little soupy at this point, but it'll thicken up as it cools a bit. Remove the insert from the cooker and set it on a trivet or a potholder while you toast the breadcrumbs. 


Put 1 Tbsp butter or oil, 1/4 c breadcrumbs, and a touch of salt, pepper and garlic or onion powder in a pan over medium heat. 

Stir until the crumbs are toasty brown, then remove them from the pan right away. 

Spoon the mac and cheese into bowls and sprinkle some of the crumbs over each one. 

This keeps well in the fridge for a couple of days and reheats in the microwave for work lunches. 


Saturday, August 22, 2015

Prosecco-Poached Nectarines

I usually avoid making plans during and after the first week of school since I'm so brain-fried from all the introductions and explanations, but yesterday turned out to be a good day to get together with some lovely people I know, so we scheduled a dinner. I was tasked with dessert and had no idea what I was going to do until I thought about doing something with peaches or nectarines. 

White peaches and nectarines are a little piece of heaven. So are yellow ones, and you could absolutely use those if you preferred. Poached and served with some vanilla ice cream and a little caramel sauce...oh boy. Somehow my scattered brain was able to make these connections and pull this lovely dessert together after a little research on marthastewart.com, bbcgoodfood.com, and some other site I can't remember right now! For poaching, you want fruit that is almost ripe or just barely ripe, not too hard and not too soft. 


Fill up a tea kettle and bring it to a boil. 

Cut an X in the bottom of each nectarine. Set up one heat-proof bowl with the nectarines and another full of ice water. 

Pour the boiling water over the fruit and let sit for 30 seconds to one minute. 


Remove from the hot water and place in the ice water to stop the cooking. When the fruit is cool enough, peel the skins. 

Bring 1 bottle of Prosecco, Cava or Sparking Wine of choice to a boil (or one bottle minus one glass, if you're so inclined). Scrape the seeds from 1/2 vanilla bean; add seeds and pod to the pot. Add juice of 1/2 or 1 lemon and 1 cup of sugar. Stir until the sugar is dissolved. 

Add peeled nectarines and add water if they're not covered by the liquid. 

Simmer, turning periodically if part of the fruit keeps poking up through the liquid, for about 12 minutes until a knife slips into the fruit very easily. 

Remove the fruit from the pot and pour off about a third of the poaching liquid. Bring the rest to a fast boil and cook until reduced by at least half. This could take 15 to 30 minutes...it felt like forever  last night since I was tired! 

When the fruit is cool enough to pick up, cut in pieces. It's very beautiful cut in halves, but I discovered in my attempt that I had bought cling nectarines that hold on to the pits for dear life. Had I realized, I might have looked for freestones, but they taste delicious either way. 


Let the reduced syrup cool to warm or lukewarm and pour over the fruit. Let it all absorb together at room temp for a few minutes, then refrigerate until a little while before serving. 

Saturday, August 15, 2015

Plum Kuchen

Reading through the family cookbook for summer recipes, I was very excited to find a Plum Kuchen recipe from a bookkeeping ledger Grandma Irene used to write recipes in. Kuchen is German for cake and some people use more of a coffee cake batter, but this is made with a yeasted dough. It's not a very sweet cake, so some people prefer to call this dish a tart instead, but that doesn't quite seem to fit either. Kuchen it is! Start to finish, it takes about 2.5 to 3 hours, but most of that time you're just waiting for the dough to rise or the oven to finish working its magic. This is going into my rotation for sure...it feels like a nice treat and it's delicious, but it's not so sweet as to trigger me to keep eating more than I should. For dessert, top with ice cream or sweetened whipped cream, and for breakfast tomorrow I'm gonna put some nice yogurt on it.  


The traditional plum for this is an Italian prune plum, which is a little more oval than round. Those weren't available at my market this week, so I used a combination of black and green. As it turns out, Grandma used to use canned plums in her "Real Plum Kuchen", which I'm sure came in handy in Phoenix in the fifties! After consulting with Uncle Bill and doing a little internet research, I decided to use her apple kuchen recipe and just put fresh plums in instead. Sprinkling the top wasn't necessary with canned plums, but the cinnamon sugar in the apple recipe was going to do the trick with these tart fresh ones. Recipe from The Way We Ate: Over a Century of Great Food from the Farnbach Family. 

Wash 7-8 large or a combination of large and small plums, removing any stickers, and set aside. I used 5 of the larger black ones and 5 of the green ones. 

Make the dough: 
Warm 1 cup milk, 1/3 cup sugar, 1/3 cup butter, and 1/2 tsp salt, stirring just until the sugar and butter dissolve. Cool to lukewarm. 

While the milk mixture cools, dissolve 2 tsp instant yeast in 1/4 c lukewarm water

When everything is no more than lukewarm, add the yeast and 2 beaten eggs to the milk mixture. Then add 3 3/4 cups sifted all-purpose flour - I confess, I didn't sift today so I could get out of the hot kitchen faster in this 90 degree weather. Sorry, Grandma!

Mix well but don't knead. Put in a bowl, cover with a clean kitchen towel, and let rise for 60 to 90 minutes until about doubled. 


When the dough is ready, preheat the oven to 350. Butter a 9" x 13" baking pan and put the dough in it. Press it out into the corners and up the sides. You can spend a little time making it perfect, but rustic is also good here. I'm sticking to that story. 


Cut the plums into slices of even thickness and lay them in overlapping rows on the dough. You can lay them down or place them sticking up a bit, but you don't need to peel them. Don't worry if they start to turn a little brown. 

When the dough is completely covered, mix 1/4 cup sugar and 1/2 tsp cinnamon. Sprinkle evenly over the plums. You could use a little more or a little less, depending on the sweetness or tartness of the plums. 

Sprinkling technique: if you use the bowl, it'll dump out in clumps. Put a pinch in your fingers and sprinkle it on from a few inches above the pan. Repeat until done. 

Bake at 350 for 45 minutes or until the dough is getting golden brown. Sprinkle with a little more sugar and let cool for about 20 minutes before serving. 


Saturday, August 8, 2015

German Potato Salad

Last year I received the most amazing gift in the mail. My uncle and aunt had compiled a book out of all my grandmother's recipe boxes and most used cookbooks. The book has inspired me to cook a few things, including the stollen I'll be posting about closer to the holidays, and I wanted to try another recipe from it this week. 


This potato salad is in the traditional German style, sweet, sour and salty from the bacon. It's not for all tastes, but I've always really enjoyed it. The use of the fat from the bacon in the dressing reflects the use everything and throw away nothing values I'm trying to bring back to my kitchen. 

It's only very slightly adapted from my uncle's beautiful collection pictured below, and came from What's Cookin' in Dragout, a collection of recipes from the village of Kampsville, Illinois, where my grandfather was from.  

Kampsville was a rural area back when Grandpa Fred was growing up, and even today it has a population of less than 400 people. 

Original recipe by Vera Steinberg.

First, boil 2 pounds of red potatoes in their jackets in the following way:

Put the potatoes in a pot and cover them with cold water. Bring the water to a boil, add 1/2 to 1 tsp salt, then reduce to a simmer. Cover the pot and boil about 15 minutes or until fork tender. 

Drain potatoes and cool about ten minutes until easy to handle. 


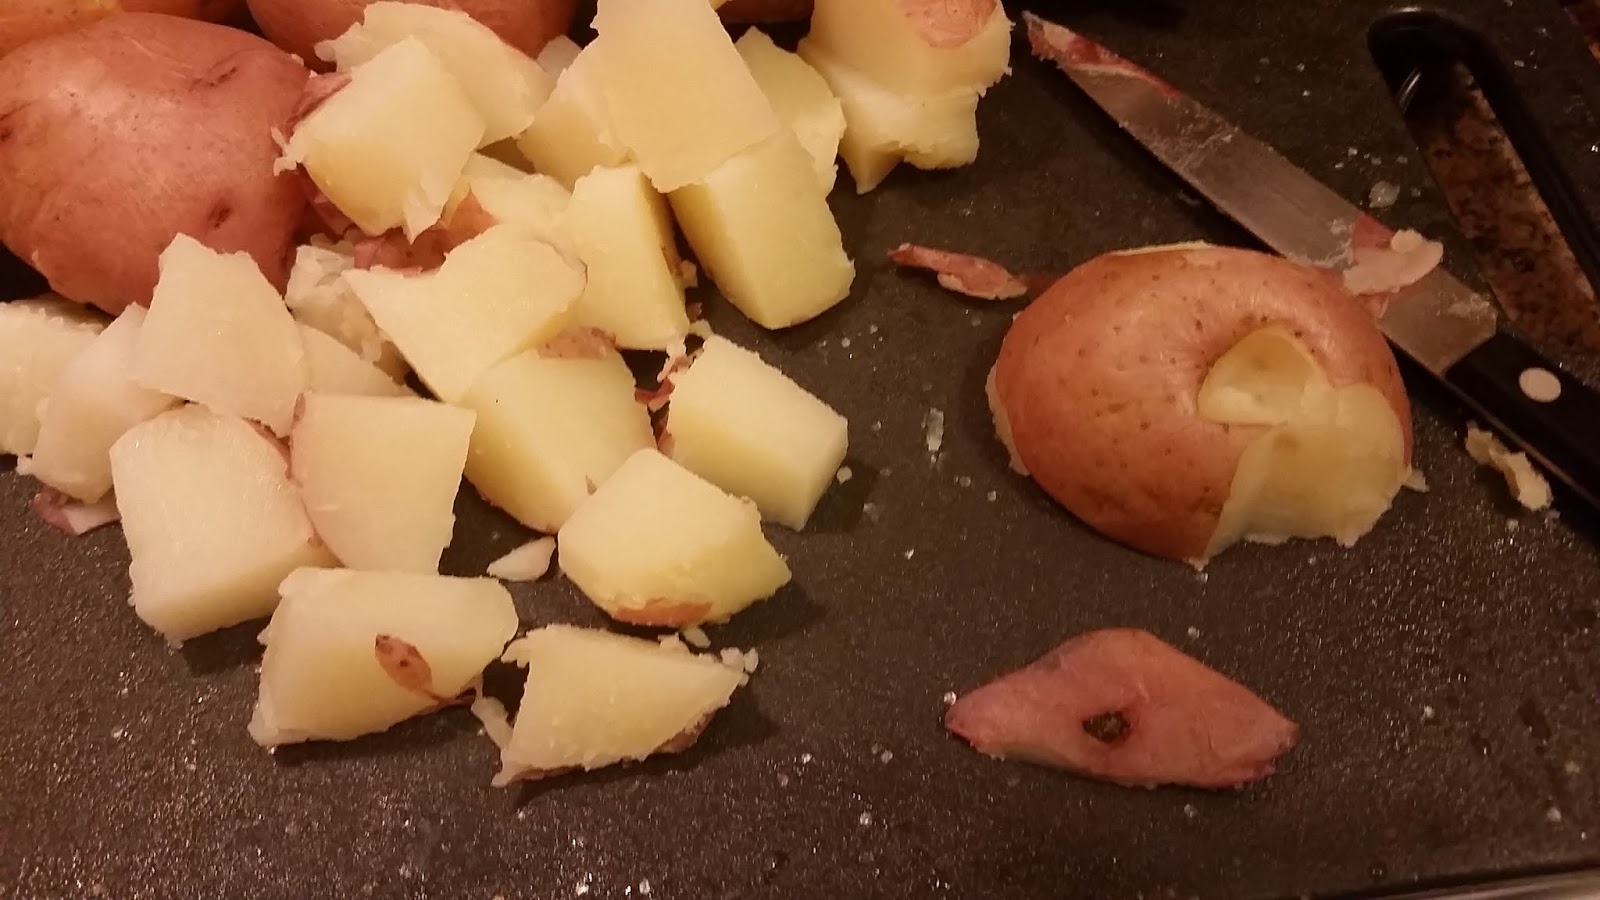
You can peel the potatoes completely, or just cut off any eyes or funny bits you see. 

Dice the potatoes into bite-size pieces. Put them in a medium-large bowl with room to toss them in the dressing. 


If your market carries slab bacon, get a 1/2 lb piece and dice it in 1/4 to 1/2 inch cubical rectangles, more commonly known as lardons. I went to the other market today that only has pre-sliced bacon, so I used 8 slices of thick-cut style, cut in half-inch pieces. 

To crisp up the pieces and render out the fat, put the pieces in a cold heavy pan over medium heat with a teaspoon of oil to get them started. 

Stir periodically, moving darker pieces to the outside and lighter pieces to the middle, until they are evenly crisp on the edges and a nice reddish brown color...


...like this. Remove the bacon with a slotted spoon and add to the potatoes. Leave the bacon grease in the pan

Cut one smallish onion or part of a bigger onion (about a cup chopped) into 1/4 inch pieces. You know, roughly. A little bigger, a little smaller, no big deal.


Add the onions to the fat in the pan and saute over medium low heat until soft. 

It looked like a lot of fat, so I let the pan cool enough to measure it. It was just 1/4 cup, an amount nobody would balk at if it were olive oil!


When the onions are soft, add 1/4 c sugar and 1/3 c white wine vinegar (apple cider vinegar is also great).  Stir until the sugar dissolves, then add about 1 Tbsp flour and stir in to thicken it a bit. 

Taste it to see if you want to add more sugar or vinegar (I added a teaspoon or so more vinegar). 


Add a nice grinding of black pepper and then stir the dressing into the potatoes and bacon. Finally, finely chop 1/4 c total of parsley and/or chives and stir in. Serve warm or refrigerate for morning...this is coming with me to another music-filled picnic tomorrow. I'll probably stir in a bit more of the herbs before I go.  To print recipe, right click on recipe image below. 


Monday, August 3, 2015

Tortilla Española: an un-recipe

AKA Tortilla de Patatas in Spain, or Tortilla de Papas in Argentina, where Mexican tortillas have arrived but are called fajitas. Language is fascinating in its ability to clarify or confuse! I learned how to make them when my college roommate's Basque mom visited. It took a few tries to get the technique down, but since then, this dish has become a potluck staple. Almost everyone can eat it, and almost everyone loves it! This photo is from this weekend's picnic. I've never followed a standard-issue recipe and I think it's one of those traditional dishes that can be made without one (with a little practice), so I'll just share the steps as I do them. 
 

These humble ingredients (plus a splash of milk and perhaps some parsley, but I didn't have any) come together in a non-stick pan to make a most satisfying dish:

eggs
potatoes
onions
extra virgin olive oil
salt
black pepper

The nonstick pan is pretty important, unless you have an extremely well-seasoned cast iron pan and the arm strength to pick it up and flip it over with one hand. This is my "is this nonstick pan finished" test recipe, actually. 

How much you need of each will depend on the size of your pan. I'm using an 8 inch here because the light weight serving plate I need to use is 10 inches and my other option is a 12 inch pan. It made about 8 servings as part of brunch, and could have been cut smaller for a cocktail party. 

You can use another type of oil, but I don't recommend it. You don't have to spend a ton of money, though...a store brand will work just fine. 

You can also use any kind of eggs, but if you splurge on the good ones, you will really notice a difference. If you don't have a farmers' market nearby or you can't get to one regularly, look for pastured eggs


As for the potatoes, my original teacher used Russets. They can get a little mushy in the poaching, though, so some prefer to use waxier red potatoes. I've been using gold potatoes for a while. They're tasty and the skins are delicate, so you just have to cut off the funky bits instead of peeling them completely. 


Cut the potatoes into pieces of more or less even size. Cut enough pieces to almost fill your pan, then transfer to a bowl and add some diced white or yellow onion. I used about a third of the giant one pictured, not all of it! Toss the potatoes and onions with salt. Start with 3/4 tsp - you can add more with the eggs later if you need it. I know some people avoid salt, but potatoes really need it. Use less if you want, but don't skip it altogether!


Put the potatoes and onions back in the pan and cover with olive oil. Bring the oil to a gentle simmer over medium low heat and poach the potato-onion mixture until just cooked through, stirring very gently to prevent any browning on the bottom, 10-15 minutes.


Start checking for doneness when you see some pieces becoming translucent like this one. 


Drain the potatoes. Keep the now-flavored oil and saute your next batch of scrambled eggs or breakfast potatoes in some of it. You're welcome.

Taste the potato mix for salt. If it needs more, add a little to the egg mixture. If not, skip the salt in the egg step. 


While the potatoes cool a little bit, crack some eggs into a bowl. Five is the perfect number for this size pan, but you might need more for a bigger pan. 

Add in some black pepper and a splash of milk or cream, then beat well. Beat the eggs. 


Add the potato mixture to the egg mixture and stir. 

Put a little of the oil back into the pan over medium heat. Pour the eggs and potatoes into the pan. 


The edges will start to set up quickly. Use a silicone or wooden spoon to gently pull them back and let more of the egg mixture spill over those edges. This helps keep them from sticking and cooks everything gently. 

Turn the heat down just a hair and let everything cook for a few minutes. 


When it looks like it's at least half cooked through, it's time to flip it. I usually look for it to bubble a little at the center, but that didn't happen this time. Instead, I turned it when it looked like this and I started to smell "done" eggs. 
Here comes the scary part!


Find a plate that's at least two inches bigger in diameter than your pan. Place it over the pan and turn off the heat. 

Using pot holders or oven mitts, put one hand on top of the plate and one hand on the handle. Take a deep breath! Flip the tortilla onto the plate and then gently slide it back into the pan. 


You can use an upside down baking sheet if you don't have the right size pan. 

Turn the burner on again (to medium heat) and let cook for about five more minutes. Turn off and leave in the pan to cool and finish cooking from the residual heat for a few more minutes before serving. 

Slide onto a serving plate and serve as is or with some garlicky aioli. 


I slid it onto a sturdy plastic plate, then topped it with another plate and wrapped it well to take it to the picnic. It made it in one piece! If serving for a small crowd, slice it like a pie. If you're sharing with a big crowd, cut it into squares.