Saturday, June 27, 2015

Quinoa Salad with Fresh Lime Vinaigrette

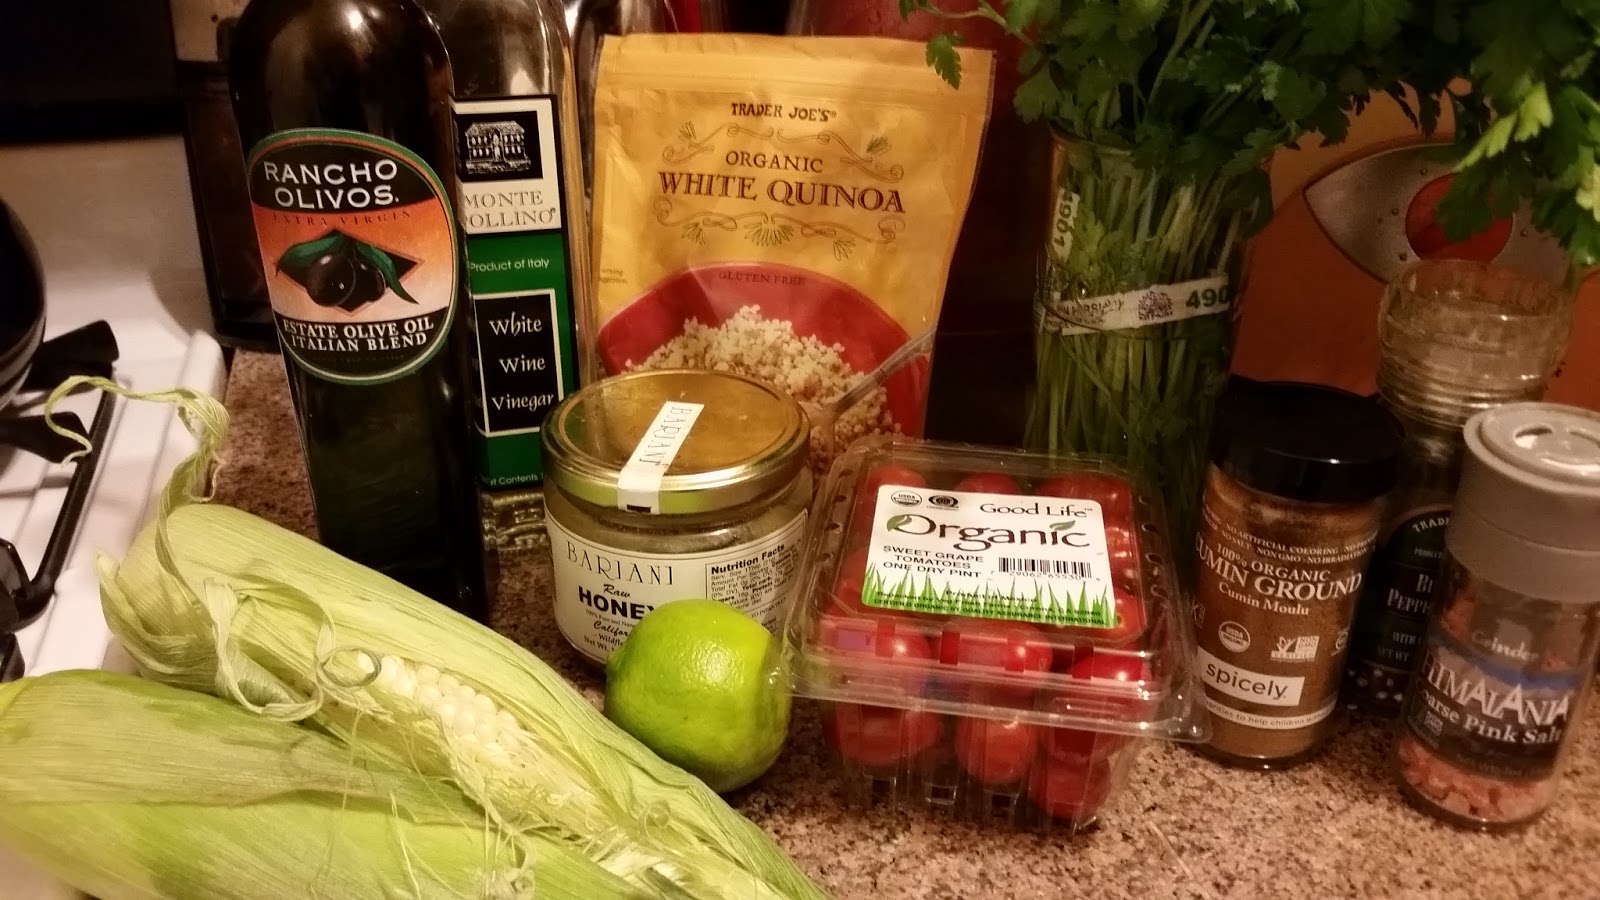
It's picnic season! I have an amazing group of friends who regularly engages in what we call "competitive picnicking". It's not technically a competition, but we always win the day at the Stern Grove Festival or other local events with comfy low-back chairs, preparation and delicious food and drink. Last weekend, I quickly threw together a quinoa salad that I wanted to improve upon a smidge and share with you. It was inspired by the Quinoa Salad that flies out the door during every lunch rush at one of my favorite places in SF, Fleur de Sel. I realized it would take me a long long experimentation period to even come close to their herb vinaigrette, so instead I decided to use some lime with the summer corn and tomatoes.


For the vinaigrette:
1 Tbsp honey
1 tsp sea salt
1/2 tsp fresh black pepper
1/2 tsp ground cumin
2 Tbsp lime juice (this may be one or two limes)
1 tsp lime zest
1 Tbsp white wine vinegar
2 Tbsp good olive oil
1 Tbsp grapeseed or canola oil
1 Tbsp grated red onion


As always, every ingredient and amount is a suggestion. Hate cumin? Leave it out. Really really love cumin? Add a little more. No honey in the cabinet today? Use a little sugar.

I like using grated onion because I like the flavor of the onion, but I don't always want to have giant pieces of it in everything. Teachers have to keep this in mind at certain times of the day!

If you want lots of onion, add some fine slices to the salad instead. The tiny holes of a standard microplane are a little small to let much through, so I use a cheese grater for that.

If you're taking the salad to a picnic, put the vinaigrette ingredients in a Mason jar instead of a bowl. Put on the lid and shake them up well. Test to see if it tastes good to you and add more of whatever you think is lacking. You can taste with a spoon or by dipping a little piece of lettuce or bread into the jar.

Now, get the salad ingredients ready.

1 cup dry quinoa
2 ears fresh corn
1 dry pint cherry tomatoes
1 c parsley leaves
a chunk of Parmigiano or Romano to shave pieces from

Cook 1 cup dry quinoa (1 c quinoa, 2 c water, bring to boil, cook 15 min). I like white quinoa, but you could use red if you prefer it. It might need to cook longer, so check the package. Note: my dear Chilean friend would think me remiss if I didn't mention that the word quinoa should be pronounced with three syllables. It's kee-noh-ah, not keen-wah.

While the quinoa cooks and cools, rinse and pat dry 1 c parsley leaves (or more, or basil, or cilantro, or arugula, or whatever you love). Leave on a kitchen towel to finish drying while you get the other stuff ready.


Prepare the corn: shuck two ears of corn and rinse to get rid of as much of the silk as possible. Stand the corn up on the stalk end and slide a knife from top to bottom to remove the kernels. Turn and repeat until all are removed. If this seems daunting or you're short on time, 2 cups of frozen corn would work here.

Yellow corn makes a prettier salad because it contrasts with the white quinoa more, but white corn was on special at the market. Growing up in the Philly area, we ate TONS of fresh New Jersey corn on the cob every summer, rolled in butter and sprinkled with salt. 

Saute the corn ever so briefly, just a minute or two, in a teaspoon of olive oil or butter.


Wash and drain 1 dry pint cherry tomatoes (or two large tomatoes, or three medium tomatoes...you get the idea). Cut into a small dice. If these were round, I'd have quartered them, but since they're longer I cut them in six pieces each. You want them cut small because the quinoa and corn are small. These were SOOO GOOOD they didn't need it, but usually I'd sprinkle them with about 1/4 tsp of salt to bring out their flavor.

Put the quinoa in the bottom of a bowl big enough to hold everything with a little room to spare. Chop the parsley and put that, the corn, and the tomatoes on top. Shave a little Parmigiano or Romano on top (not pictured - oops). If you're taking the salad to a party, put the lid on and carry the dressing separately. When it's time to serve it, pour the dressing over the salad, put the lid back on, and shake it up to toss. You might start with 2/3 of the dressing in case you don't want to use it all.


Friday, June 19, 2015

Summer Pesto Ideas

OK, so I have a confession to make. I'm still obsessed with this Herb Pesto Recipe. It's a great formula of (by weight) a little garlic, one part herbs and greens, one part nuts or seeds, one part cheese, and 1.5 to 2 parts oil. I've made it with parsley and carrot tops. I've made it with parsley and baby kale. I've made it with all basil. I've swapped in walnuts for the pumpkin seeds. In order to indulge without going through a whole loaf of bread in a couple of days, I've been finding ways to use it with things other than hearty crostini.


Herbs and baby greens are really beautiful right now, but of course, you could also make any of these things with pesto from a jar or made by your local market. Nobody will care, or if they do, they won't say anything because they love you and that's the most important thing about people you share food with.
  • The classic: toss with spaghetti, gnocchi or shells, top with grated cheese.
  • Roast or steam some carrots, toss them with the pesto.
  • Roast or steam some new potatoes and/or turnips, toss with the pesto.
  • Tuna, white bean and pesto salad (pictured): toss one can of drained, rinsed white beans with 1/2 cup pesto. Top with red onion and/or halved cherry tomatoes. Serve as is or on a bed of salad greens. 
  • Mix with ground chicken for pesto meatballs.
  • Use instead of tomato sauce for pizza, baked or grilled.
  • Spread on crostini.
  • Use instead of mayo on a cheese or turkey sandwich. 

Sunday, June 14, 2015

Cool Cucumber Green Smoothie

I'm working on a sinful version of sticky buns using croissant dough, but the experimentation phase is taking a little longer than I hoped! In the meantime, I thought I'd share my green smoothie du jour. Those delicious little Persian cucumbers are in season, and were on sale this week, so I made sure to use one.
-a fistful of greens (mixed salad greens today, but you could use kale, spinach, chard, romaine, whatever you've got)
-1 small apple, cored and cut into chunks
-1/2 ripe banana
-1/2 to 1 cup cucumber, half the peel removed
-1 Tbsp ground flaxseed 
-cold water
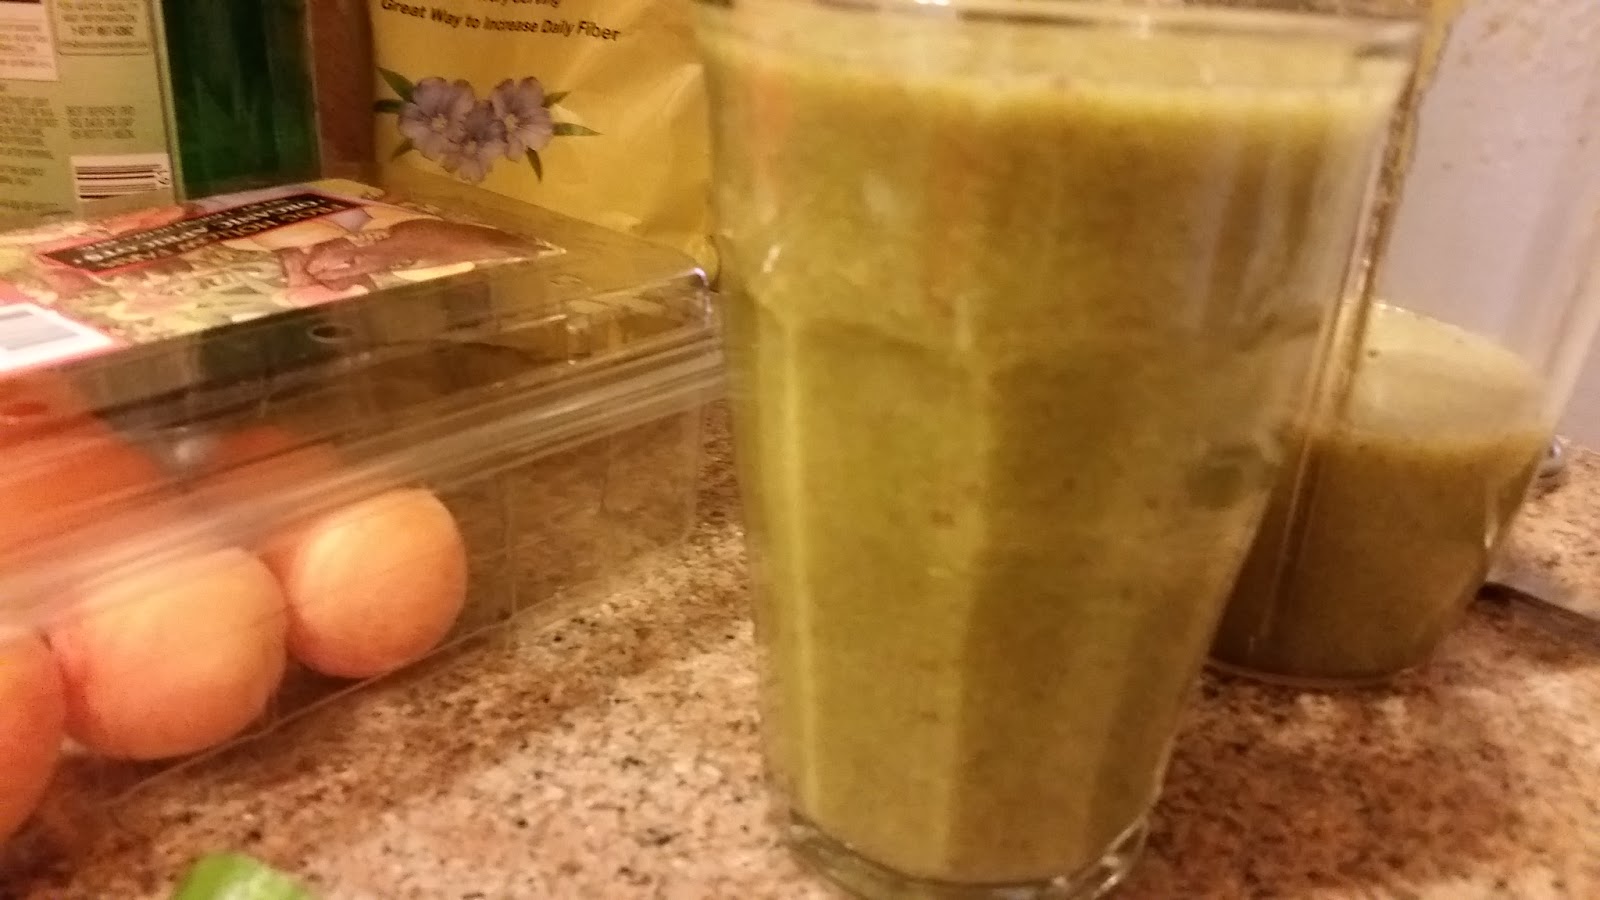
Put it all in a powerful blender (you might opt to peel everything if you have a gentler blender) and enjoy! Mine wasn't the prettiest color, since I didn't have avocado on hand to brighten it up, but it kind of looks like a pureed kiwifruit. One of the pics has apricots on the side, but those are so good right now that I will only eat them plain.

Wednesday, June 10, 2015

Arancello Step Three: Bottling the Deliciousness

After two months, the Blood Orange Liqueur is ready! It's ready to bottle, and then to sip, pour over vanilla ice cream, or mix with sparkling wine or sparkling water. If you missed steps one and two, here is the link to those. 


Of course, before you start to bottle the liqueur, you need to find or buy some bottles that can be closed securely. If you go thrifting you might find a collection of lovely different bottles, and you can buy some synthetic corks to seal them if they don't have proper lids. I've been ordering swing-top bottles online from specialtybottle.com, which has a variety of sizes and shapes for much cheaper than the kitchen stores($5.99 each - no way!). The bottles pictured are 250 ml. 


Wash the bottles. You don't have to boil them like for canning because of the high alcohol content in the Arancello, but wash them in warm soapy water or rinse them with diluted distilled vinegar to make sure they're clean. 


Put on some nice background music or a mindless TV show - the process will take about 30-45 minutes. 

Lay out a kitchen towel to protect the table and keep things from sliding around. Set up
- the clean bottles
- the jar of Arancello
- some dampened coffee filters
- a long-handled ladle
- a small funnel


Place a dampened coffee filter in the funnel and the funnel in a bottle. 

Ladle the liqueur into the funnel and let it flow into the bottle. If it's filtering well, it should be a slow but steady stream like this. 

Fill a little higher than this, but not all the way up to the tippy top. Keep going until you've filled as many as you can. 

If it's going much faster than the stream above, there may be a hole in the filter, so just replace it when the liquid already in there has already flowed through. If it slows to a drip, either ladle more into the funnel or replace the filter with a new one. 


This batch filled about 11 and a half 250 ml bottles. 

Now I'm all set with hostess gifts for the next few months, plus a couple just for me. 

1) just with an ice cube
2) about an ounce with sparkling water
3) a filled bottle

If you try to make it, let me know how it turns out! Blood orange season is short, but you could try other kinds of oranges or lemons. Meyer lemons are amazing, if you can get them. 


Saturday, June 6, 2015

Jammin' with Momma: Strawberry Jam

My momma is kind of famous for her jams and marmalades, but I'd never been able to make them with her. While she was raising two kids, working full time and commuting from Swarthmore to North Philly, my mom didn't have a lot of time to make jam. When we moved to California, she had a job that took her out of town a lot. By the time she left that job and had more free time, I was living 400 miles away. But finally, this weekend, I visited her and we got a chance to make jam together.

We went to her friend Jeanette's amazing and spacious kitchen (with my fantasy six burner stove) and made two kinds of strawberry jam, some blueberry bourbon sauce, and tangerine marmalade with the help of Jeanette and another friend, Nora. All of this took just about four hours with so many hands and burners working at once! It's a time consuming task, but it's fairly simple. Processing in this way will make the jam shelf-stable for about a year. However, if the whole process just seems overwhelming, the jam recipes below should keep for about two weeks in the fridge or two months in the freezer without going through all the jar-boiling and sealing. I'm just going to share the strawberry recipes for now, as sharing all would be too much information. 

First, we stopped by the farm stand for the fresh-picked Oxnard strawberries. No luck on blueberries there (it's probably too warm an area) but we got some beautiful ones at the market. 


Mom now has all her canning supplies in a basket so she can carry them to friends' houses on request. The basket holds lids, rings, labels, a large funnel, two kinds of tongs and a magnetic thingy for taking the lids out of the boiling water. Wish I'd found this thingy before my finger got burned, but oh well. 

The canning pot, of course, is too big for the basket. It is fitted with a rack to hold the jars in. 

The first use of the pot is to boil the jars, partly to sterilize them and partly to warm them before you put in the warm jam. You can heat the lids in the same pot, again to sterilize but also to warm up the rubber to create a good seal. 

Remove the stems and most of the white core from the strawberries, either with a paring knife or with a nifty strawberry corer like this, sold by fine kitchen stores to people who like to buy gadgets for every purpose even though they probably have perfectly good paring knives. 

Mom's basket contains packages of pectin for emergencies, but she usually uses other fruits to extract the pectin needed to firm up the jam. The first recipe called for orange zest and juice (with pulp). This worked great but definitely added some orange flavor.

Note: hold the microplane on top of the fruit to zest it so you can see if you're getting any of the white pith. If you are, dump that bit so it doesn't go in the jam and make it bitter. 

The other recipe used finely diced green apple, so we were glad to have Nora and her mad knife skills on hand. 

The apple is more neutral in flavor, so it didn't alter the flavor of the berries as much.

We couldn't figure out why one of the recipes called for a tablespoon of butter to be added after the jam reached the required 220 degrees. A quick Google search cleared that up: the fat in the butter "disrupts" the foam that forms on top, saving you the trouble of skimming it off. If you're vegan or dairy free, skip this and skim instead. 

We also couldn't figure out why none of the jams actually reached a temp over 210 degrees, but I suspect it's because we used a lot less sugar than the original recipes called for. 

When the jam was ready, it was ladled into the jars up to 1/2 an inch from the top. The next step was to make sure the top was clean, place the lid, and then screw on the rings until secure but not yet tight. 


Using the "jar lifter" tongs, we placed the jars back in the hot water bath, turned the heat back up to high, and processed them for ten minutes starting when the water comes back to a full rolling boil. 


Remove and place on a towel to begin cooling. Make sure not to put hot jars on a cold surface. When they've cooled a bit, the vacuum created inside should have drawn the lids down a bit, so if you push down and they make a noisy "pop" back up, you may not have a good seal. It's like if you don't get that "pop" when you open a jar from the supermarket you don't eat that jar. 

Recipes: (I'll make them into cards this week, but Momma's computer doesn't like that website). 

Sassy Strawberry Jam (ever so slightly adapted from Jan Berry's The Art of Preserving)

-5 pounds firm, maybe even just under-ripe strawberries (a dry pint might be shy of a pound, so weigh if you can)
-juice and zest of 3 oranges
-5 cups white granulated sugar (raw is OK, but it might muddy the flavors)
-1 Tbsp butter

Wash and stem the berries. Place 4 pounds of the berries, the juice and the zest in a pan and bring to a boil. Mash the strawberries lightly with a potato masher. Add the sugar and stir until dissolved. Cut up the last pound of strawberries and add them in, then boil rapidly over medium high heat for twenty minutes, or until they reach 220 degrees, or until they thicken a bit and deepen in color, stirring occasionally to keep the bottom from scorching. Remove from heat, stir in butter, and let cool for a bit before adding to warm jars. Process as above.

Ruby Strawberry Jam (just a bit adapted from Ina Garten's Easy Strawberry Jam)

-6 pints fresh strawberries
-4 cups granulated sugar
-1/4 c orange liqueur
-1 large or 1 1/2 small green apple, peel and core removed, diced finely
-1 1/4 cups (1 cup is fine) blueberries - the blueberries add a little depth of flavor and color, but don't stand out as a separate flavor
-2 Tbsp butter

Rinse the strawberries in cold water and cut out the stems and white hulls. Cut the larger berries in two to four pieces each, leaving the small berries whole. Toss with the sugar and orange liqueur, then bring to a boil.

Add the apple and blueberries to the boiling strawberries. Stirring occasionally to make sure the bottom isn't sticking and burning, keep them at a full rolling boil, not a simmer, 25-30 minutes until they reach 220 degrees or they've thickened up a bit and become a beautiful ruby color. Remove from heat and stir in butter to eliminate foam. Process as above. 

Sunday, May 31, 2015

No-Knead (slow rise) Olive Bread

Making your own bread might seem like a waste of time to some, especially with so many amazing bakeries here in the Bay Area, but it's a very satisfying task, saves you money (those six-dollar loaves and four dollar slices of toast can really add up), and it's actually easier than you might think. You don't have to turn up the heat in your apartment to 85 to create natural yeast or anything extreme like that, but if you haven't read about when Jeffrey Steingarten did that in The Man Who Ate Everything, I highly recommend you pick up a copy. Hi.La.Ri.Ous.


Some years ago my old hometown friend Adam shared a link to the now incredibly famous No-Knead Bread recipe shared by Jim Lahey to Mark Bittman's NYT blog.  I tried it and it made such lovely bread that I'll probably never need another base recipe (unless I'm making sandwich bread or focaccia). You don't need a mixer or super strong forearms for kneading. The only "specialty" equipment you'll need for optimal results is a 5-6 qt Dutch oven or stock pot with a lid that's oven-proof to 450 or 475 degrees. Why the lid? It traps the steam let off by the bread and makes an amazing crust with a good chewy bread inside. A recipe I tried once suggested using a spray bottle periodically for the same effect, but I'm sticking with the pot.

The original recipe takes very little work but a total of 15-22 hours including rising times, so it is weekend bread for those of us with full-time gigs. That timing is what I'm working off of here, but I also add adjustments for weekdays (more yeast allows for a faster rise time).

So why olives? Olives are one of my absolute favorite things on earth and one of the few things I like in my bread. Much as I love raisins and walnuts, I don't really like them in bread. It's a texture thing, I guess. You can certainly leave the olives out and replace them with one of those other things.


First, drain and chop 1 to 1.5 cups pitted brined olives. I'm using green, which are milder and thus can be used with a wider variety of sandwich fillings, but they usually need to be pitted if they're not stuffed with something. I got a jar at Trader Joe's instead of hitting the expensive olive bars at the specialty markets. You could use Kalamatas if you preferred, but not the old-school black olives in the can. Those are too mild to stand out in the bread.

If you need to pit the olives, smash them with the side of a chef's knife. Yes, you could use an olive pitter, but for me the little suckers always go flying when I try that. Pull out the pits and set the "meat" aside. 


Chop the olives into 4-6 pieces each. If you use walnuts instead, give those a rough chop as well.

Add the olives to a large bowl with 3 1/4 c flour, a heaping 1/4 tsp instant or active dry yeast*, 1/2 tsp fine salt (up the salt to 1 1/4 tsp if you're not using olives), and 1 2/3 c warm water.  Make sure the yeast you're using has an expiration date very far from the day you're using it or you might not get good results.

I use 2 c all purpose and 1.25 c whole wheat, but you can use any combination of those you like. All white flour (bread or all-purpose) will give the best crust, hands down. 

*Faster rise options: use 1 tsp instant yeast for a 6-10 hour rise, 3/4 tsp rapid rise yeast for a 4-6 hour rise.


Now just mix it all together with a wooden spoon or a pair of clean hands. The dough should be kind of sticky and a little wet.


Cover the bowl with a clean dish towel or a piece of plastic wrap and let sit in a warm spot for 12-18 hours.* "Warm" means 70 degrees or so and my apartment is rarely that warm, especially since the June fog has decided to visit us a month early here in the Bay (#KarlTheFog). I turn on the hood light over the bowl to keep it just a smidge warmer than the rest of my kitchen.


*Faster rise options: remember if using more yeast, let sit for the time indicated above. You can mix it together before work and pick up the next step when you get home. 


After the rising time, the dough will have spread around the bowl and developed these little holes and bubbles at the surface. Usually I see more of the bubbles, but since it has doubled in size and that's the most important thing, I'm not worried. I could let it go another hour, but a girl's gotta keep her yoga schedule.

If some of the surface looks a little dried out, don't worry about that either. It'll re-hydrate in the next step.


Generously flour a wooden board and turn the dough over a few times, folding an end and pushing down with the heel of your hand. OK, technically this is kneading, but it's just for a few seconds as opposed to ten minutes. 

Now flour a large piece of parchment paper and put that under the dough. You could also use a second clean dish towel, but you'll need to use a LOT of flour for that to keep it from sticking.


Create a ball with the dough with the smooth side up and rough sides underneath. It's hard to see here because the olives disrupt it, but the dough is having a lovely alchemical moment and creating the basis for the lovely crust.

Cover again with the dish towel (or a clean one if you put if on something dirty by accident) and tuck it in for a nice nap.


After 60 minutes (30 min for the faster rise options), put the empty pot in the oven and turn the oven on to 475 degrees for a 30 minute pre-heat. 450 is perfectly fine if that's as hot as your pot will handle. Some recipes say to put the lid on for the pre-heat, but I find that it makes things too complicated when it's time to put the dough in the pot. I leave it off until the dough goes in to avoid burning myself. 

After the 30 minute pre-heat, CAREFULLY remove the pot from the oven with your biggest oven mitts or maybe double pot holders. Not only is the pot extremely hot, but also the weight of the pot will cause the heat to go to your skin more quickly if your finger slips. This is a lesson I learn over and over again, maybe so I'll remember to share it with you.


Pick up the parchment or towel and flip the dough into the pot. I didn't put enough flour, so it stuck to the paper a little. If that happens, just peel it off carefully, a little at a time. If you put too much flour, it sprinkles all over the place and stains your pot. Any tips for cleaning burnt on stuff from enamel would be appreciated!

Put the lid on the pot and return it to the oven.

Bake for 30 min, remove the lid, turn down the heat to 450 and continue baking for 15-20 minutes more until the crust is a lovely medium brown.


Carefully remove the loaf to a wire rack and let cool at least 30 minutes...if you can manage to wait that long. Bread smells awfully good when it's baking!

Slice with a bread knife and eat as is, with some good butter (the kind from grass-fed cows) or use to make hearty sandwiches.

Egg salad or sliced turkey would be particularly good with this bread.


right click recipe image to save, then print from your computer. 


Sunday, May 24, 2015

Crispy Waffles with Blueberry Bourbon Sauce and Banana

It's blueberry season! I was thinking cobbler, then I was thinking blueberry pancakes, but then I remembered I don't actually love blueberries IN my pancakes, but I love blueberries ON my pancakes. From there it was just a couple more synaptic leaps from the blueberry infused bourbon a kind bartender shared with me recently, the ripe bananas on my table and the waffle iron gathering dust in my cabinet to this inspired weekend treat!


Melt 12 Tbsp butter (1.5 sticks) and let cool for the waffles.

For the sauce: Rinse 1 dry pint blueberries (a little over 2 cups) and remove the stems. Add them to a 1 or 2 quart saucepan with 3/4 c bourbon, 2 Tbsp water and 2-4 Tbsp sugar depending on your taste and how sweet the berries are. If you don't want to use alcohol, just replace it with water and add some more sugar and a little lemon peel. 

Bring to a boil, boil for about two or three minutes to let most of the booze cook off, and then reduce the heat and let simmer, uncovered, for 10-15 minutes.


Set aside and let cool to room temperature. Try not to dive in with a big spoon. This sauce would also be amazing with vanilla ice cream and/or pound cake, or even on chicken.

OK, now back to the waffles...


Mix the dry ingredients in a medium bowl:
2 c all purpose flour (a mix of whole grain and all purpose would also be good)
2 Tbsp corn meal (optional)
3/4 tsp salt
3/4 tsp baking soda


Separate 2 eggs. Put the whites in a mixer bowl (or a bowl you can use a hand mixer in). Beat on medium with the whisk attachment or regular beaters until frothy, then sprinkle in 2 Tbsp sugar and turn it up to high. Beat until the whites stay up in a stiff peak when you pull up the beater.

Mix the yolks in a large bowl with 1 1/2 c milk (or 1 3/4 c buttermilk, but I'm out), the melted butter from above, and 2 tsp vanilla extract.

Plug in your waffle iron to start heating it up.

Add the dry ingredients to the wet ingredients and mix just until well combined.


Fold the egg whites into the batter - this will help keep the waffles nice and light. Isn't it a bummer when you order some in a restaurant and they turn out gummy?

Anyway, put the whites on top of the other mixture and fold them in gently with a rubber or silicone scraper, pulling up from the bottom and turning the bowl as you go.

Melt 2 more Tbsp butter to brush onto the waffle iron. When the iron is hot (the light on mine turns green, but follow the directions for yours), brush some butter onto the top and bottom. You could use oil for this if you prefer. 


Spoon some batter into each of the four inner corners of your waffle iron. It will spread out once you close the machine. I tend to under-fill rather than over-fill because it's an easier clean-up!

Close the iron and let cook until it tells you it's ready. Don't open it before that unless you smell burning!


If you over-fill, this will happen. It's no big deal, just put a little less the next time. I scrape the leaks off so they don't have a chance to burn onto the iron!


While you wait, you'll see this lovely steam escaping and smell the vanilla. Mmmmmmm.

Turn on the oven to 200 degrees to prepare for the final crisping step.

Keep the butter or oil at the ready to re-grease between waffles.


Remove from the iron with a fork - don't be a hero and try to take it out with your fingers! Or don't be lazy like me and decide getting a fork is a bother...stick the fork into or under the edge of the waffle and lift up from there.

This color is perfect to me and the first one came out like this! Miraculous! Usually the first is a throwaway like with pancakes, so if it is, just adjust the settings on your waffle iron and get to the next one.


As each waffle comes out, pop it directly onto the rack in a 200 or 250 degree oven. Yeah, I ate a corner of the first one to test it. It was kind of crispy, but the rest was much crispier after 10 minutes or so in the oven. A little extra crispiness will help a lot once the sauce goes on.


Slice about 1/2 a medium banana for each waffle, because what goes better with blueberries than bananas? If you don't like them, no biggie, just leave them off.

Spoon some sauce over each waffle and enjoy them right away! If the waffles will sit for a while, put the sauce on the side so they don't get soggy. Freeze leftovers and re-heat from frozen in the toaster, not in the microwave.