When last semester ended, I had visions of a very productive summer off from teaching. What happened instead was a lot of rest and binge watching...it turned out that what I really needed was to just be for a while. I got in a little sun time, a few swims, and some wonderful time with friends. The closets are still overstuffed and in need of reorganization, but my soul is healed from the past few years of intense work stress.
Despite being something that usually re-centers me the blog, like the closets, didn't see much action. I mean, there are four seasons of Vikings on Amazon Prime, y'all! But I've been tinkering with some panna cotta ideas, and here is the result! Panna cotta means cooked cream in Italian, and it's really quite a simple process. Warm the cream with vanilla or another flavoring, stir in sugar or honey, dissolve some gelatin, and let cool for two to four hours. When I started imagining how I wanted this to come out, I thought some lovely apricots would be a great foil for the cardamom. Then, I went to the store and tasted one of the delicious end of season cherries, and my plans changed.
To mold a panna cotta, the traditional way is to use a ramekin and flip it out onto a plate once it has set up. If you want to do it that way you might do the cherry part first and let that set up before doing the cream part, or save the cherry part and make it just before serving. I'm presenting these in 4 oz Mason jars instead so I can take them to a picnic...it also worked well for taking extra test servings to work so I wouldn't eat them all myself!
Because there are so few ingredients, it's important to get the best ingredients you can. It'll make a big difference. I went with half and half in the end, but have also made this with all heavy cream and with one cup each of cream and half and half. It all works.
Gently smash 2 cardamom pods just so that they crack and the cream can get inside them. No need to crush or grind them.
You could add a teeny bit of ground cardamom if you don't have pods, or if you prefer, you can add 1/2 a vanilla bean instead, or 1 tsp of vanilla extract.
I've even seen a recent recipe using bay leaves from the lovely and talented Chris Cosentino...might have to try that one some time.
In a heavy pan, gently warm 2 cups half and half or heavy cream with the two cardamom pods. As it warms up, stir in 3 Tbsp honey. Heat it until it's very warm but not simmering--if it starts to bubble, take it off the heat right away. Let it sit and absorb the cardamom flavor while you soften the gelatin.
Sprinkle 1 pkt powdered gelatin over 2 Tbsp cold water. Let soften for 5-10 minutes.
Strain the cardamom pods out of the cream and pour the very warm cream over the gelatin, stirring vigorously to dissolve completely, 1-3 minutes. It should smell really good by now!
Now set out the ramekins, Mason jars or glasses you'll be using to mold the desserts.
Lightly oil the ramekins or Mason jars with a flavorless oil. Avocado oil is becoming more affordable (at Costco and Trader Joe's) so it's now in my cabinet. Let's hope it's as good for you as they say! I put a drop or two of oil into each jar and rub it around with a paper towel.
Using a strainer to remove the cardamom pods, pour the cream mixture into the jars or ramekins. Set the panna cotta in the fridge for at least two hours before topping or eating.
And now, the cherries...you can start them after the panna cotta have been chilling for 90 minutes.
You can, of course, top the panna cotta with plain fresh fruit in season. What could be better? But if you'd like a presentation with two layers, all you need are these few things. Frozen cherries would be perfectly fine out of season, and if the ugly-but-tasty fruit is cheaper than the perfect looking cherries, this could save you a little money. The supermodel cherries were $5.95 a pound, and these delicious but bumpy little guys were $2.79. Remove the stems and pits from about 3/4 lb fresh cherries or 1 pkg frozen cherries. This cherry pitter thingamajig you see below is one of very few unitasking tools in my kitchen. I bought it thinking it would also pit olives as advertised, but it only works for certain varieties of those. Ah well, at least it doesn't take up too much space.
Put the piercy thing through the place you removed the stem from, and split each cherry in half to make sure you've actually gotten the pit out. Every now and then there's one hiding up in there.
Yup, pitting cherries is messy. Wearing an apron or something that's already deep red in color is highly recommended!
Add the pitted cherries to a non-aluminum pan with juice of 1 lemon, 2 Tbsp water and 1 Tbsp honey or sugar. Simmer for about 20 minutes. Remove from heat and cover.
If you're serving on plates, you can just put these on as is. If you're transporting them in jars or making a bottom layer in ramekins that'll be the top layer when you flip them out, let 1 tsp gelatin soften in 1 tbsp cold water for 5-10 minutes and then stir in the very warm cherries. The gelatin is just enough to set up the juice and keep everything nice and neat, or if on the bottom will set up when chilled so it doesn't mix in with the cream.
Once the panna cotta has set quite a bit (almost 2 hours), ladle even amounts of the cherries over the cream. Don't worry if there are bubbles. Return the jars to the fridge and let set for at least one more hour or overnight.
BTW, if you transport these somewhere, keep them cool. The gelatin will melt in the sun. The good news is that it'll set right back up in the fridge, but not in the pretty layers.
Sunday, August 14, 2016
Wednesday, July 6, 2016
White Bean Salad with Cilantro Pesto
Cilantro inspires some seriously strong feelings in people. When I first moved to California, having been raised on Arizona style Mexican food, I was appalled at the weird taste in the guacamole whenever I ordered it. I learned to love it in Asian food, and now have come to really love it.
This salad and one I made up last summer are inspired by meals from my favorite takeout lunch spot in the Financial District in SF, Fleur de Sel. It's the kind of place where the food is not just made with great technique and ingredients, but with a lot of heart and soul. The recipe makes about 6 servings and only takes a few minutes once the beans are cooked and cooled.
Start with 3 cups of white beans, cooked from about 1 cup dried or a little less than two cans. I like navy beans for this, but cannellini are fine, too. If you cook them from dried, let them cool to warm or room temp before mixing with the rest of the ingredients so you don't cook them. Drain the beans.
Wash and pat dry 1 bunch each cilantro and Italian parsley (or just one of the two, depending on your preference), 1 green apple, 1 medium/small cucumber, and two green onions.
Weigh out approximately 40 g total of parsley and cilantro leaves and 40 g Pecorino Romano cheese. I'll show you measuring cup amounts after this pic, but I use weight to balance out pestos and pesto-type dressings. By weight, one part herbs to one part cheese, one part nuts if using and one and a half to two parts oil is the magic formula. 43 grams is close enough to 40 to work just fine.
Grate the cheese using your tool of choice. If you're using a measuring cup, it's a little harder to get closer with things like greens and cheese...if just grated into the cup, the gratings and leaves take up more volume than they do when they're packed. However, the weights worked out to about 2 c herbs and 2/3 c cheese, packed down a little but not too much.
The approx. 70 g olive oil worked out to 3/8 cup or 6 Tbsp.
Put the cheese and herbs into a food processor and blitz while you drizzle in the oil, about a minute. If you don't have a food processor, you can finely mince the herbs with a chef's knife. Peel and dice the apple and cucumber to make about 1 cup of each (I half-peeled the cucumber), sprinkle the cucumber with a teensy pinch of salt, and chop up the green onions. Stir them with the pesto into the beans and then taste for salt and pepper. You probably won't need more salt because the cheese is very salty, but it'll depend on your taste and your ingredients.
Set aside for at least 30 minutes if you can to let the flavors come together. Serve cold or room temperature and enjoy! Great with whatever protein you like.
This salad and one I made up last summer are inspired by meals from my favorite takeout lunch spot in the Financial District in SF, Fleur de Sel. It's the kind of place where the food is not just made with great technique and ingredients, but with a lot of heart and soul. The recipe makes about 6 servings and only takes a few minutes once the beans are cooked and cooled.
Start with 3 cups of white beans, cooked from about 1 cup dried or a little less than two cans. I like navy beans for this, but cannellini are fine, too. If you cook them from dried, let them cool to warm or room temp before mixing with the rest of the ingredients so you don't cook them. Drain the beans.
Wash and pat dry 1 bunch each cilantro and Italian parsley (or just one of the two, depending on your preference), 1 green apple, 1 medium/small cucumber, and two green onions.
Weigh out approximately 40 g total of parsley and cilantro leaves and 40 g Pecorino Romano cheese. I'll show you measuring cup amounts after this pic, but I use weight to balance out pestos and pesto-type dressings. By weight, one part herbs to one part cheese, one part nuts if using and one and a half to two parts oil is the magic formula. 43 grams is close enough to 40 to work just fine.
Grate the cheese using your tool of choice. If you're using a measuring cup, it's a little harder to get closer with things like greens and cheese...if just grated into the cup, the gratings and leaves take up more volume than they do when they're packed. However, the weights worked out to about 2 c herbs and 2/3 c cheese, packed down a little but not too much.
The approx. 70 g olive oil worked out to 3/8 cup or 6 Tbsp.
Put the cheese and herbs into a food processor and blitz while you drizzle in the oil, about a minute. If you don't have a food processor, you can finely mince the herbs with a chef's knife. Peel and dice the apple and cucumber to make about 1 cup of each (I half-peeled the cucumber), sprinkle the cucumber with a teensy pinch of salt, and chop up the green onions. Stir them with the pesto into the beans and then taste for salt and pepper. You probably won't need more salt because the cheese is very salty, but it'll depend on your taste and your ingredients.
Set aside for at least 30 minutes if you can to let the flavors come together. Serve cold or room temperature and enjoy! Great with whatever protein you like.
Tuesday, June 21, 2016
Zucchini Pakoras with Tomato Raita
Sooo...the downside to taking my first teacher summer off will be not getting extras from people's gardens at work! I have a bit of a black thumb, if you're wondering why I don't grow more things myself. Still, the zucchini and tomatoes at the market are getting yummier and cheaper as the summer goes on. Recently I've started experimenting with Indian recipes that I used to love pre-pepper allergy diagnosis. Pakoras are so delicious, and can be made vegetarian or with fish or chicken if you like.
It seems so decadent to deep-fry food, and yet, if you do it right it doesn't add very much oil to the finished product.
First, make the Raita for dipping. Here are most of the ingredients, minus the cumin. My raita is not 100% authentic, of course, partly because I kept forgetting to get whole cumin seeds to toast. It's still very yummy.
Put 1 c plain Greek or other strained yogurt, preferably whole milk, in a small to medium bowl. Dice 1 medium tomato and sprinkle it with salt. Wash and pat dry 1/3 c cilantro leaves. If you hate cilantro, use mint instead.
Finely chop the cilantro leaves and add to the bowl with 1/4 tsp each ground cumin, black pepper and fine salt. Stir in with the tomatoes and a squeeze of lemon juice and put in the fridge until the fritters are ready.
Let it sit and keep draining while you make the batter. You should have a lovely little green pool of zucchini juice at the bottom of the bowl once it's done, in about 20 minutes.
OK, now you have two more things to grate, this time with a microplane or the fine part of the box grater. Peel and grate a heaping 1/2 tsp fresh turmeric and 1 tsp fresh ginger. If you use dried, use 1/4 tsp turmeric and 1/2 tsp ginger.
Add the turmeric and ginger to 2/3 c chickpea flour (aka garbanzo, gram or besan flour), 1/2 tsp each ground cumin and ground coriander, and 1/8 tsp ground cloves. Add 1/4 tsp to 1/2 tsp cayenne if you're so inclined, and, you know, not allergic like me. Stir in 1/4 c warm water to make a thick doughy batter, adding more water 1 tsp at a time if not all the flour has been incorporated. Let sit at room temp while you bring the oil up to frying temp. Don't add the veggies just yet.
Now, put 1 qt mild oil in a heavy pot. I use sunflower or safflower, but you can also use canola if you're not vehemently opposed to it. People are touchy about their oils these days! Heat over medium-high flame for about 5 minutes before you check it. You want the oil to come up over 350 degrees so you cook at 350 when the food is added and the temp drops. It's best to use a thermometer for this, but somehow I've messed up two of them in the past year. Time to stop buying the cheapies and invest in a good one. In the meantime, I used this wooden spoon trick to check the oil temperature.
Once the oil is hot, stir the shallots and zucchini into the chickpea batter. I had to move them to a larger mixing bowl to do this properly, at least 4 cup size rather than 2 cups.
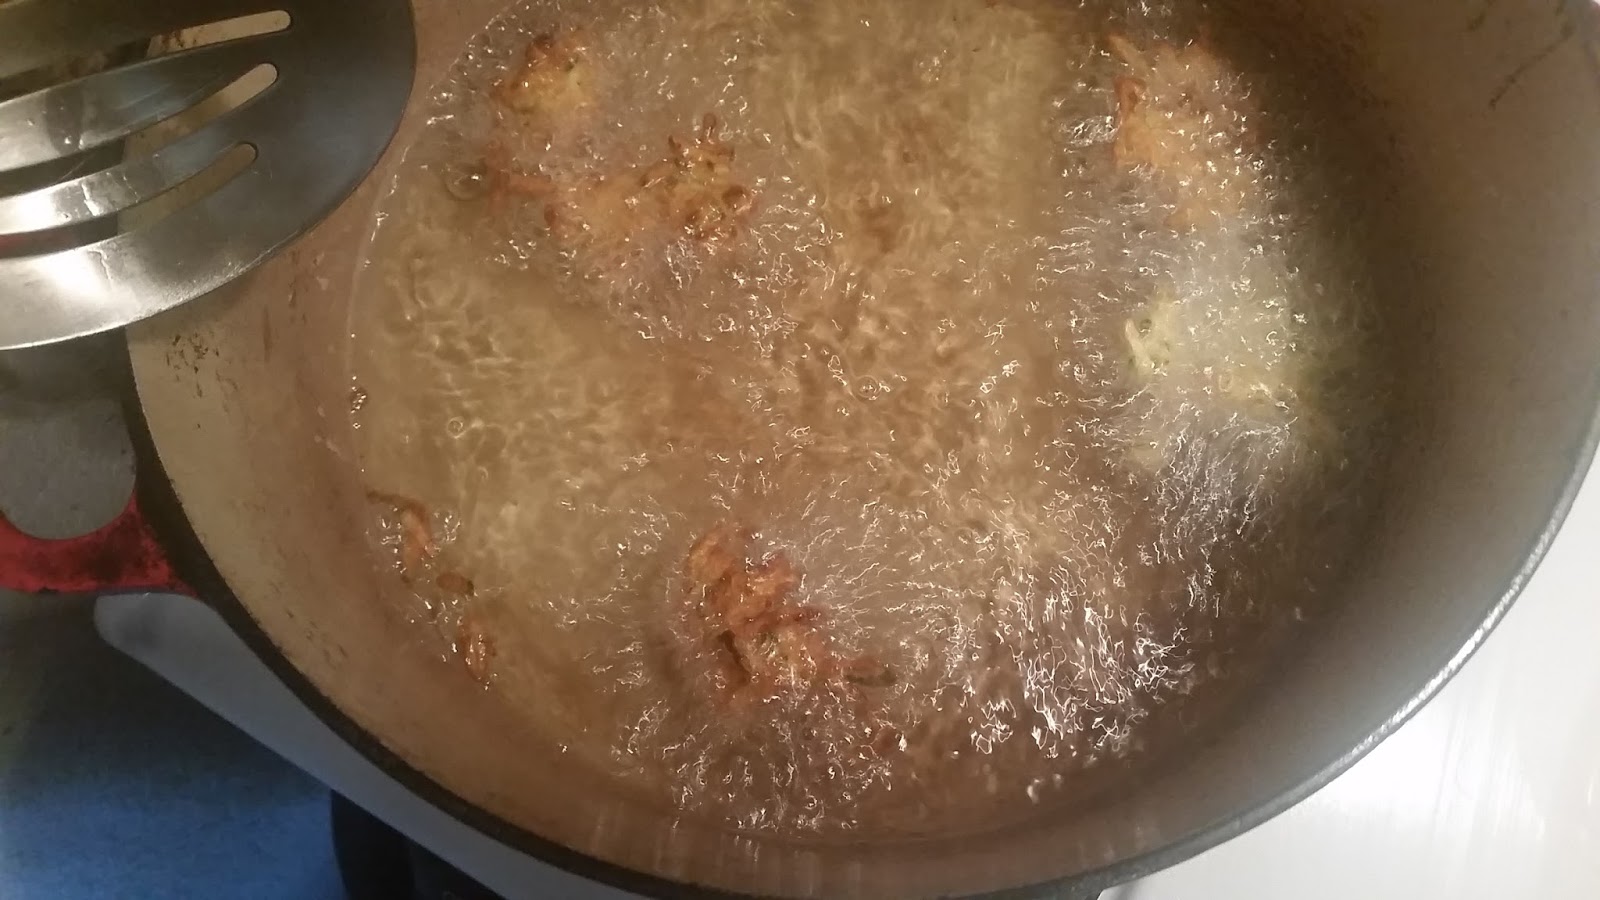
Spoon the mixture into the oil in approximately 1 Tbsp size balls. Lower the spoon down to the top of the oil rather than dropping them from above to avoid splashing the oil on yourself. Move the fritters around with a slotted spoon so they cook evenly.
It seems so decadent to deep-fry food, and yet, if you do it right it doesn't add very much oil to the finished product.
First, make the Raita for dipping. Here are most of the ingredients, minus the cumin. My raita is not 100% authentic, of course, partly because I kept forgetting to get whole cumin seeds to toast. It's still very yummy.
Put 1 c plain Greek or other strained yogurt, preferably whole milk, in a small to medium bowl. Dice 1 medium tomato and sprinkle it with salt. Wash and pat dry 1/3 c cilantro leaves. If you hate cilantro, use mint instead.
Finely chop the cilantro leaves and add to the bowl with 1/4 tsp each ground cumin, black pepper and fine salt. Stir in with the tomatoes and a squeeze of lemon juice and put in the fridge until the fritters are ready.
Next, prepare about 1/2 pound zucchini (2 medium). Wash them, remove the stem end and any stickers, duh, but sometimes I forget, and grate them on a coarse grater. You can use a box grater or the grating disc on the food processor, whichever is less awful to clean. Peel and finely mince 1 shallot or 1/4 onion.
Put the minced shallot aside. You'll need to drain the zucchini a bit so it doesn't make the pakoras too wet. Put the grated zucchini in a fine mesh strainer over a bowl and sprinkle with a little salt (maybe 1/4 tsp). Toss a little bit to distribute the salt and press down on it with a paper towel or clean dish towel to start the release of the liquid.
OK, now you have two more things to grate, this time with a microplane or the fine part of the box grater. Peel and grate a heaping 1/2 tsp fresh turmeric and 1 tsp fresh ginger. If you use dried, use 1/4 tsp turmeric and 1/2 tsp ginger.
Add the turmeric and ginger to 2/3 c chickpea flour (aka garbanzo, gram or besan flour), 1/2 tsp each ground cumin and ground coriander, and 1/8 tsp ground cloves. Add 1/4 tsp to 1/2 tsp cayenne if you're so inclined, and, you know, not allergic like me. Stir in 1/4 c warm water to make a thick doughy batter, adding more water 1 tsp at a time if not all the flour has been incorporated. Let sit at room temp while you bring the oil up to frying temp. Don't add the veggies just yet.
Now, put 1 qt mild oil in a heavy pot. I use sunflower or safflower, but you can also use canola if you're not vehemently opposed to it. People are touchy about their oils these days! Heat over medium-high flame for about 5 minutes before you check it. You want the oil to come up over 350 degrees so you cook at 350 when the food is added and the temp drops. It's best to use a thermometer for this, but somehow I've messed up two of them in the past year. Time to stop buying the cheapies and invest in a good one. In the meantime, I used this wooden spoon trick to check the oil temperature.
Once the oil is hot, stir the shallots and zucchini into the chickpea batter. I had to move them to a larger mixing bowl to do this properly, at least 4 cup size rather than 2 cups.
Spoon the mixture into the oil in approximately 1 Tbsp size balls. Lower the spoon down to the top of the oil rather than dropping them from above to avoid splashing the oil on yourself. Move the fritters around with a slotted spoon so they cook evenly.
Set up a tray or baking sheet with a brown paper bag or a few paper towels laid flat on it. As the fritters turn nice and brown, take them out and place them on the tray so that the paper absorbs the extra oil. Serve immediately with the tomato raita and some more cilantro and tomato.
Tuesday, June 14, 2016
City Slicker Farms -- Urban Gardens
Northern California is full of foodies and incredible farmers' markets and upscale supermarkets, and yet has a number of food deserts, areas where residents have very little access to fresh food and rates of related diseases like diabetes are very high. In 2001, a group of neighbors founded City Slicker Farms, utilizing empty lots and back yards to grow fresh, healthy food for the neighborhood on a sliding scale.
Last weekend, the organization held the Grand Opening of its new space, West Oakland Farm Park. The park expands City Slicker's programs to include a community garden for individuals, teaching space, and even a park and playground for families to enjoy.
I first heard about programs like these, which give urban neighborhoods new meeting places, green spaces and jobs in addition to fresh vegetables, when I read about Karen Washington and her work in the South Bronx.
I hope this space allows many families a space to play in and establish healthy habits of all kinds. The people of West Oakland deserve it!
Last weekend, the organization held the Grand Opening of its new space, West Oakland Farm Park. The park expands City Slicker's programs to include a community garden for individuals, teaching space, and even a park and playground for families to enjoy.
For those with an unused backyard, City Slicker can help them turn it into a source of healthy food.
Seedlings are free to community garden participants and include many varieties of greens.
There were many organizations with information about accessing health care and healthy foods, including some educational games for the kids.
Kids got a prize for estimating blueberries rather than candies.
At the other end of the space were the park, with a Caribbean singer playing music to get the kids moving, and the playground.I first heard about programs like these, which give urban neighborhoods new meeting places, green spaces and jobs in addition to fresh vegetables, when I read about Karen Washington and her work in the South Bronx.
I hope this space allows many families a space to play in and establish healthy habits of all kinds. The people of West Oakland deserve it!
Monday, May 30, 2016
Beef Brochettes with Mallmann's Chimichurri
Brochettes? Kabobs? Kebabs? Skewers? Whatever you call them, they're a great summer party food. Add a chimichurri sauce made with fresh herbs, and they become something magical.
Beef kabobs were one of my favorite grilled summer foods when I was growing up. I also love just plain veggie skewers, and those would also be great with the chimichurri. Mostly I like the meat and veggies together. These are halved grape tomatoes, but zucchini or mushrooms also work well.
First, though, the Chimichurri. Make it at least one hour ahead, preferably one day in advance, so the flavors have time to come together. Chimichurri is an Argentine sauce, but somehow in my year of study in Argentina, living with three different families there, it never made it onto my radar. They happened to be families that didn't serve that with their asado (grilled meats, an important part of the Argentine diet). It seems to be all over the place in the U.S. these days, but to make it myself I decided to turn to Francis Mallmann, a famed Argentine chef featured in the Chef's Table series on Netflix. The original recipe is from NY Magazine here.
Wash 1 cup each parsley and oregano leaves, (they can be scant cups, you don't have to pack them) removing the stems before measuring, and set on a dishtowel to dry for a few minutes. Put 3/4 cup water and 2 tsp fine salt in a small pan and heat until the salt is dissolved, stirring a bit. Set aside. Peel and finely mince about 2/3 to 3/4 of a head of garlic - you can take the smell off your fingers with some lemon juice when you're done. Set the garlic in a medium bowl. I could have minced more finely, but it was getting kinda late! A garlic press would be perfectly fine to speed up the process.
Finely mince the oregano and parsley and add it to the bowl of garlic. Stir in 1/4 c red wine vinegar and 1/2 c olive oil. Whisk in the water-salt mixture, stirring well, cover the bowl tightly and set in the fridge for at least an hour, preferably a day. It'll keep for about three days. And now, the meat...if you're using bamboo skewers, don't forget to soak them in water for an hour before grilling! This is less important if you're using a grill pan on the stove like I am, but still, don't catch your food on fire, please. If soaking this way, turn them upside down to get both ends wet.
Beef kabobs were one of my favorite grilled summer foods when I was growing up. I also love just plain veggie skewers, and those would also be great with the chimichurri. Mostly I like the meat and veggies together. These are halved grape tomatoes, but zucchini or mushrooms also work well.
First, though, the Chimichurri. Make it at least one hour ahead, preferably one day in advance, so the flavors have time to come together. Chimichurri is an Argentine sauce, but somehow in my year of study in Argentina, living with three different families there, it never made it onto my radar. They happened to be families that didn't serve that with their asado (grilled meats, an important part of the Argentine diet). It seems to be all over the place in the U.S. these days, but to make it myself I decided to turn to Francis Mallmann, a famed Argentine chef featured in the Chef's Table series on Netflix. The original recipe is from NY Magazine here.
It's a very simple, yet very flavorful sauce made with fresh oregano, parsley, garlic, red wine vinegar, and olive oil. Yes, you could use dried herbs, but in summer, why would you? (Use 1/3 the amount you'd use of fresh, so 1/3 c dried oregano in place of 1 c.)
Wash 1 cup each parsley and oregano leaves, (they can be scant cups, you don't have to pack them) removing the stems before measuring, and set on a dishtowel to dry for a few minutes. Put 3/4 cup water and 2 tsp fine salt in a small pan and heat until the salt is dissolved, stirring a bit. Set aside. Peel and finely mince about 2/3 to 3/4 of a head of garlic - you can take the smell off your fingers with some lemon juice when you're done. Set the garlic in a medium bowl. I could have minced more finely, but it was getting kinda late! A garlic press would be perfectly fine to speed up the process.
Finely mince the oregano and parsley and add it to the bowl of garlic. Stir in 1/4 c red wine vinegar and 1/2 c olive oil. Whisk in the water-salt mixture, stirring well, cover the bowl tightly and set in the fridge for at least an hour, preferably a day. It'll keep for about three days. And now, the meat...if you're using bamboo skewers, don't forget to soak them in water for an hour before grilling! This is less important if you're using a grill pan on the stove like I am, but still, don't catch your food on fire, please. If soaking this way, turn them upside down to get both ends wet.
Mix the marinade in a medium-large bowl: 1/3 cup each red wine vinegar, olive oil, and strong brewed coffee, 1 tsp each ground mustard, salt, and pepper, and 1 large or 2 small cloves garlic.
Cut 1 to 1.5 pounds beef (something tender is good, like tenderloin or sirloin) into even sized cubes and put in the marinade for 30 minutes to an hour. You can leave it at room temp for that long, but if it'll be longer, put it in the fridge.
While the meat marinates, prepare the other veggies. Cut them to the same size as the meat if possible--leave small cherry tomatoes whole, or halve them if you cut the meat very small. If you use an onion, cut it in half and pull out one or two layers together before cutting into chunks. That way you can cut the chunks more evenly.
Now, assemble the brochettes. Thread on a piece of meat, a slice of onion, and a piece of veg, then repeat. Or make some that are all meat, or all veg, however you like it. Heat up the grill or a grill pan while you do this, nice and hot so you get pretty grill marks on the outside.
Cook, turning once halfway through, until you see nicely dark brown spots on the outside. Start testing for doneness with a couple of end pieces and put them back on if need be. it could be just 2 min per side, or 5 or 6 per side or more depending on your fire and the size of the pieces. Enjoy with the Chimichurri and your favorite summer libation!
Saturday, May 21, 2016
May Update
Hi everyone - I just realized I haven't posted at all this month. Life has been so crazy that I haven't even had the energy to be creative. End of semester testing and paperwork, numerous visits to the vet's office, oh, and there was the strike. I've been eating as well as I can through it all and finding that the change in what I'm eating is helping me feel better than I'd have thought. I'm taking some time off this summer, so I should be able to think of some really fun stuff to share.
Of course, in the midst of all the madness of the last couple of months, my trusty food processor went kaput (RIP). The motor was fine, but that little plastic thingy on the lid that locks it broke off. Wah! I got a new one and I'm really happy with the one I chose, as it also acts as a mandolin slicer, slicing evenly with adjustable thickness. Check out the three thicknesses of radishes (thinnest setting and next two) and the cucumber (thickest setting). I wanted to keep slicing and test all the settings at once, but a girl can only eat so many radishes on one bowl of black beans. I love the paper-thin look of the radish at the top, and I don't have to worry about slicing off my fingertips with the mandolin!
The top of the processor has a feeding tube with two options, a small tube for skinny things and the standard feeding tube for wider things like whole blocks of cheese, which I haven't tried yet.
You adjust the thickness with a sliding lever that lowers or raises the blade. Pretty nifty, no? That's all for today - see you after the end of the semester!
Of course, in the midst of all the madness of the last couple of months, my trusty food processor went kaput (RIP). The motor was fine, but that little plastic thingy on the lid that locks it broke off. Wah! I got a new one and I'm really happy with the one I chose, as it also acts as a mandolin slicer, slicing evenly with adjustable thickness. Check out the three thicknesses of radishes (thinnest setting and next two) and the cucumber (thickest setting). I wanted to keep slicing and test all the settings at once, but a girl can only eat so many radishes on one bowl of black beans. I love the paper-thin look of the radish at the top, and I don't have to worry about slicing off my fingertips with the mandolin!
The top of the processor has a feeding tube with two options, a small tube for skinny things and the standard feeding tube for wider things like whole blocks of cheese, which I haven't tried yet.
Subscribe to:
Posts (Atom)