Showing posts with label always hungry book. Show all posts

Saturday, March 18, 2017

Oven-Baked Cassoulet with Instant Pot Assist

A wine bar near me used to have Cassoulet Nights. Since I got my Instant Pot, I'd been thinking I could make a cassoulet in it...but once I found and bought some of the traditional ingredients, I did more research and realized I couldn't. Yes, you could toss all the stuff in there and set it for 40 minutes and have something really delicious, but it wouldn't have the same flavor dimensions of the real deal. However, as there are many steps in the process, the IP helped me with two of them.

Cassoulet is made with different meats in different cities, as it was once an inexpensive dish that used whatever was readily available to people in that area. Once upon a time, duck confit was a necessity for French people trying to make it through a pre-refrigeration winter. Today, it costs a fortune, so although I love it, I opted for the Toulouse garlic sausages (slightly less expensive) and pork shoulder (a lot less expensive). They're hard to find, though, so feel free to use another kind of sausage you like, even chorizo if you like some heat.

It can be put together in a day, but dinner might be pretty late so it's best to break it up over two or three days. The three main steps are: cooking the beans, cooking the pork, and baking the cassoulet.

1) Day 1: cook the beans and season the meat (sorry, canned beans won't work here): 

Sprinkle salt and pepper over 1 to 1 1/2 pounds pork shoulder. (Buy 2 pounds total of meat, either 1 pound each pork shoulder and sausage, or 1.5 pounds pork and 1/2 pound sausage). Wrap back up and put in the fridge.

For the beans, you'll need 1 lb flageolet or navy beans, 3/4 tsp salt, a few sprigs of thyme, a bay leaf, a small shallot, and 1 or 2 garlic cloves. You can wrap up the seasonings in a little cheesecloth, or just plan to fish them out one by one.

If you use the Instant Pot, cover the beans with another inch or so of water. Set the pot on high for 21 minutes for flageolet beans or 20 for navy beans, which are a little smaller but a lot cheaper. Let the pressure release naturally for another 15-20 minutes, then release any remaining pressure with the valve and put the beans and their liquid in something to store them in the fridge overnight.

You can also soak the beans overnight and simmer them for about 45 minutes, or cook them from dried for about 2 hours. 

2) Day 2 (or do Day 1 and keep in fridge): Brown and/or cook the meats

For this step you'll need, in addition to the pork and sausage mentioned above, 4 oz diced pancetta, 1 Tbsp olive oil, 1 yellow onion or 3 shallots, 1 small celery stalk, 2 small or 1 medium carrots, and 2 Roma tomatoes

Cut the pork shoulder into roughly three inch pieces. Chop the vegetables, not too finely if you're using the Instant Pot. Put the pancetta and oil into the Instant Pot and then push the saute button. Starting from a cold pan allows the fat to render out better. Stir when the bottom bits are nice and brown. Remove the browned pieces and place in a small bowl, then add all but 1 Tbsp(ish) of the fat from the pan to the bowl. The fat will really flavor everything...and I'm using way less than most recipes. A lot of them call for duck fat and/or salt pork. It's just starting to render out here...
...and beautifully brown here. 
Add the sausages in to brown those on two sides. You don't need to cook them through because they'll finish up in the final, lengthy, baking. 
Remove and set aside. Put the shallots, carrots, and celery in the pot and stir with a wooden spoon to move around and scrape up the brown stuff from the bottom. When the vegetables start to soften, add in 1 cup chicken broth (or water, or white wine). Stir a little more, then add the tomatoes and pork. If there's a bone, add that, too. Close the lid and set IP for 25 minutes high pressure. Once it finishes the time, allow another 15-20 minutes for the pressure to release naturally. If you release the pressure right away, the meat will be tough. 


You can let the meat cool, refrigerate it and assemble the next day, or you can get to step three now.

3) Day 2 or 3: Assemble and bake...aka le douleur exquise...the waiting can be HARD!


Pre-heat the oven to 300. Layer half of the beans in a heavy, oven-proof pot. Sprinkle half of the pancetta over them. Remove half the chunks of pork and add to the pot, then some of the vegetables from the pork cooking, then another layer of beans and pork. Layer in the sausages somewhere along the way and pour any remaining pancetta fat and vegetables/liquid from cooking the pork over the top. Add some chicken broth and some water or bean cooking liquid to just cover the beans.
Put in the oven, uncovered, for what will be a total of 4-5 hours. Yup, you'll have to smell it cooking for THAT LONG. You can blame Kenji from Serious Eats, as I took the timing from him. After two hours, there should be a little bit of a crust forming. Tap it and make a hole in it. Add a little more liquid through the hole so you don't re-hydrate the caramelized bits on the top. After that, check again every 30 minutes for 2-3 more hours, adding more liquid if the beans are dry in the middle. The crust will provide some texture so that you don't need bread crumbs, and may even get very dark, which is OK, but I don't think the size of my pan will let that happen.  Serve hot with a little fresh parsley and grated lemon zest...and don't forget the medium red wine!


Save recipe image to print from your computer.


Sunday, August 28, 2016

Roasted Broccoli

I signed up recently for a CSA box, mostly because I'm too lazy to get up and to to the farmers' market on weekend mornings! I got one that I can customize from farmfreshtoyou.com, but this week I forgot to click "save" after I made my changes. Oops! That meant a third box in a row with a giant head of broccoli. I promised a coworker that I'd give it to her if I didn't get it cooked this weekend--sorry, Alicia, but I found the time!

Now, I do love broccoli. It's just that it's hard to feel inspired by it, and it really needs to be prepared correctly, which means some careful peeling I don't always want to do at the beginning of the semester. With the first bunch, I tried making a chicken and broccoli casserole, which felt like cooking a foreign dish since I'm not from a family that makes a lot of casseroles. It was OK, but not terribly exciting. Roasting it seemed like a much more modern take on the classic veggie.
Preheat the oven to 450. All you need is the following for four to six servings:

  • 1 1/2 pounds broccoli
  • 2 Tbsp olive oil
  • salt and pepper to taste (start with 1/4 tsp salt and add more after roasting if you're afraid of over salting)
  • a pinch of chili flakes if you roll that way

You can use florets, but if you get whole broccoli, be sure to use the stem as well as the top. Slice the florets of 1 1/2 lbs broccoli into even sized pieces, 1/3 to 1/2 inch wide. They won't all be even, but get them as close as you can. Remove the tough peel from the outside of the stem AND from the sliced florets. You'll need a paring knife or a good sharp peeler to peel the stem. You can peel with your fingers from the bottom of the floret slices or use a paring knife again.
Slice the stem into sizes about the same thickness as the others, or a smidge thinner. Cover a baking sheet (or two) with parchment or aluminum foil and pile the broccoli in the center. Drizzle the olive oil and seasonings over the broccoli and toss them for a minute with your (clean) hands.
Spread them out evenly on the pan. Pop them in the 450 oven and set a timer for 7 minutes. After 7 minutes, pull them out and flip the pieces over. A pair of tongs will work better than a spatula, but the spatula will work if that's all you've got. 
At halfway, some pieces will be browning and others will be blackening. You can taste a piece to see if it needs salt. Pop them back into the oven for another 7 or 8 minutes. Take them out and serve with Green Tahini Sauce or just lemon and butter. I made some hummus with Kalamatas today, so that's how I served them this time. 


Tuesday, June 21, 2016

Zucchini Pakoras with Tomato Raita

Sooo...the downside to taking my first teacher summer off will be not getting extras from people's gardens at work! I have a bit of a black thumb, if you're wondering why I don't grow more things myself. Still, the zucchini and tomatoes at the market are getting yummier and cheaper as the summer goes on. Recently I've started experimenting with Indian recipes that I used to love pre-pepper allergy diagnosis. Pakoras are so delicious, and can be made vegetarian or with fish or chicken if you like. 


It seems so decadent to deep-fry food, and yet, if you do it right it doesn't add very much oil to the finished product. 

First, make the Raita for dipping. Here are most of the ingredients, minus the cumin. My raita is not 100% authentic, of course, partly because I kept forgetting to get whole cumin seeds to toast. It's still very yummy. 

Put 1 c plain Greek or other strained yogurt, preferably whole milk, in a small to medium bowl. Dice 1 medium tomato and sprinkle it with salt. Wash and pat dry 1/3 c cilantro leaves. If you hate cilantro, use mint instead. 

Finely chop the cilantro leaves and add to the bowl with 1/4 tsp each ground cumin, black pepper and fine salt. Stir in with the tomatoes and a squeeze of lemon juice and put in the fridge until the fritters are ready. 

Next, prepare about 1/2 pound zucchini (2 medium). Wash them, remove the stem end and any stickers, duh, but sometimes I forget, and grate them on a coarse grater. You can use a box grater or the grating disc on the food processor, whichever is less awful to clean. Peel and finely mince 1 shallot or 1/4 onion. 
Put the minced shallot aside. You'll need to drain the zucchini a bit so it doesn't make the pakoras too wet. Put the grated zucchini in a fine mesh strainer over a bowl and sprinkle with a little salt (maybe 1/4 tsp). Toss a little bit to distribute the salt and press down on it with a paper towel or clean dish towel to start the release of the liquid. 

Let it sit and keep draining while you make the batter. You should have a lovely little green pool of zucchini juice at the bottom of the bowl once it's done, in about 20 minutes. 

OK, now you have two more things to grate, this time with a microplane or the fine part of the box grater. Peel and grate a heaping 1/2 tsp fresh turmeric and 1 tsp fresh ginger. If you use dried, use 1/4 tsp turmeric and 1/2 tsp ginger. 
Add the turmeric and ginger to 2/3 c chickpea flour (aka garbanzo, gram or besan flour), 1/2 tsp each ground cumin and ground coriander, and 1/8 tsp ground cloves. Add 1/4 tsp to 1/2 tsp cayenne if you're so inclined, and, you know, not allergic like me. Stir in 1/4 c warm water to make a thick doughy batter, adding more water 1 tsp at a time if not all the flour has been incorporated. Let sit at room temp while you bring the oil up to frying temp. Don't add the veggies just yet. 

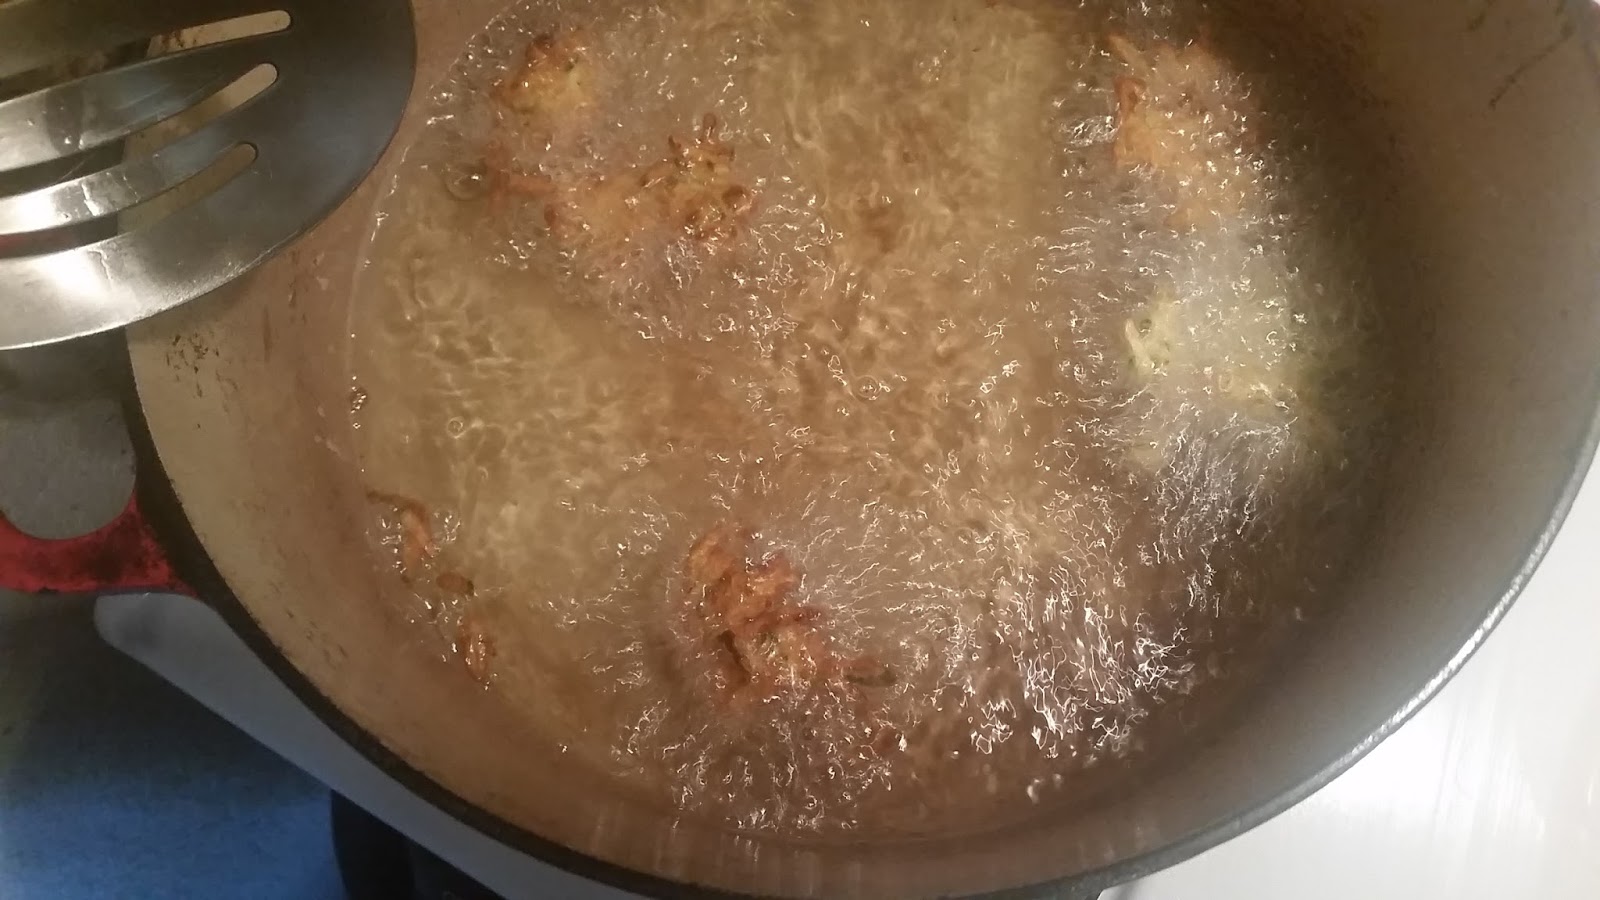
Now, put 1 qt mild oil in a heavy pot. I use sunflower or safflower, but you can also use canola if you're not vehemently opposed to it. People are touchy about their oils these days! Heat over medium-high flame for about 5 minutes before you check it. You want the oil to come up over 350 degrees so you cook at 350 when the food is added and the temp drops. It's best to use a thermometer for this, but somehow I've messed up two of them in the past year. Time to stop buying the cheapies and invest in a good one. In the meantime, I used this wooden spoon trick to check the oil temperature. 

Once the oil is hot, stir the shallots and zucchini into the chickpea batter. I had to move them to a larger mixing bowl to do this properly, at least 4 cup size rather than 2 cups. 

Spoon the mixture into the oil in approximately 1 Tbsp size balls. Lower the spoon down to the top of the oil rather than dropping them from above to avoid splashing the oil on yourself. Move the fritters around with a slotted spoon so they cook evenly. 
Set up a tray or baking sheet with a brown paper bag or a few paper towels laid flat on it. As the fritters turn nice and brown, take them out and place them on the tray so that the paper absorbs the extra oil. Serve immediately with the tomato raita and some more cilantro and tomato. 


Sunday, April 10, 2016

Maple Pecan Cheesecake Bars

I've been tinkering with this one for a couple of weeks now, and it's a really lovely and comforting (co-worker approved) treat without too much sugar added. It does require a few hours of refrigeration to set up, like any cheesecake, but apart from that it's very simple to put together. 

There are just a few ingredients: pecans and dates for the crust, and cream cheese, sour cream, maple syrup, vanilla, and one egg for the filling. 

First, bring the cheese, cream and egg to room temperature. Pre-heat the oven, then start the crust. Put one cup of pecans (toasted or raw, but no salt added) 1/3 cup pitted dates, and a tiny pinch of salt into a food processor. Start by pulsing and then press on until it's all evenly ground together. This should just take about a minute or two. Line an 8x8 inch baking pan with a piece of foil big enough to hang over two edges (you'll use this sling to take the bars out of the pan later) and press the mixture evenly into the foil liner. Press it a little up the edges, too. Set aside until the filling is ready.

Now, the filling: Put 1 1/2 pkgs cream cheese (12 oz) into a mixer or a bowl and stir a bit. Add 2-3 Tbsp sour cream and 1/4 cup maple syrup and mix until combined on medium-low. It's important to not over-beat the cream cheese. It's ok if it's a little lumpy looking--the lumpy bits will melt into the rest. If it's over-beaten, on the other hand, it'll be lumpy when it's cooked. 

Add the egg and 1/2 tsp vanilla and beat just until mixed in well. Spread evenly over the crust (an offset spatula woulda been perfect for this, but the silicone scraper was already covered in batter, so why dirty something else?) and put in the 325 degree oven for about 25 minutes, just until set on top. Let cool at room temp for one hour, um, somewhere your pets can't get to it and sneak little bites when they think you're not looking, and then refrigerate for 3 hours or overnight. 

Remove from the pan, using the foil sling, and cut into pieces. Serve as is or with a cup of coffee. Most of all, enjoy the treat! 


Monday, March 21, 2016

Dark Chocolate Bourbon Pecan Truffles

Yeah. I don't know what more there is to be said, other than that these are not for the faint of heart. I would have tried a batch with good milk chocolate, like Tcho or Scharffenberger, but I'm still in phase 2 of the Always Hungry solution, and milk chocolate will have to wait until Phase 3. This made about 16-18 truffles, kinda on the big side, and just one will do ya.

The ingredient list is very short for something that packs such a big punch:
-10 oz 70-77% dark chocolate
-1/2 cup heavy cream
-2 Tbsp bourbon (unless you don't like it, in which case skip it or add another chocolate-friendly booze)
-1/4 tsp vanilla extract
-1 cup pecans

I'm deviating from my usual Chocolove brand, because Guittard is also really good and it was on sale. Plus, it's local to the Bay Area.

You can use bars, no problem. These are baking discs meant for melting, but I'm pouring the hot cream on top rather than using a double boiler, so I chop them with a serrated knife.

Put the chocolate in a medium-large heat-proof bowl and get out a whisk.

Put the bourbon and vanilla into a little container so you can dump it into the bowl when the cream is hot. I used 3 Tbsp of the bourbon because I really like it, but I'm afraid that might be a little much for some people.
Put the cream in a small, heavy pot over medium-low heat, watching rather more carefully than you might do with water. When the edges start to bubble, give it a quick stir and let heat for another few seconds until it just starts to bubble again.

Turn off the heat and pour over the chocolate with the bourbon mix, whisking quickly for a minute or two until the chocolate is smooth.
Resist the temptation to just pour the whole thing in your mouth.

When it's smooth, scrape down the stuff stuck above on the sides and pop the bowl into the fridge. Let cool for an hour, possible 90 minutes, but in 2 hours as is suggested by most recipes, it's usually really too hard to deal with. I've broken enough scoops to have learned to take it out while it's still malleable.
In the meantime, put 1 cup of pecans in the food processor and grind, starting with pulsing, until they look about like this. Stop before they become flour or butter! If you don't want to deal with this step, you can roll the truffles in cocoa powder instead.
When the chocolate (ganache) is hardened enough to hold together but soft enough to roll into a ball, take it out of the fridge and get out a small scoop or a spoon.

Set the pecans next to the chocolate and a plate with waxed paper or mini cupcake liners next to that. I'm not always organized, but you need to set stuff out before you get your hands sticky!
Scoop out some chocolate, roll it into a ball with your hands, and place it in the pecans. Roll it around in there until it's covered, then move to the plate. Repeat until you're finished with all the chocolate, with maybe a little to scrape out of the bowl for yourself.

Yeah, there's a bite missing from the bottom one. Quality control is important. I finished it after the photos!

Saturday, February 6, 2016

Salted Dark Chocolate Cashew Clusters

For me, 70% cocoa content chocolate has long been a special treat that doesn't trigger crazy sugar binges. Now, I've adapted a recipe from Always Hungry by Dr. David Ludwig and Chef Dawn Ludwig that has their official stamp of approval. The recipe makes 4-6 servings, but you can easily double or triple it if you plan to share. Let's get to it!

There are just four ingredients: 

  • about 3 oz dark chocolate, 70% or higher cocoa content
  • 1/2 cup raw cashews
  • 2 Tbsp unsweetened shredded coconut (unsweetened is important if you're following their program, less so if you're not)
  • a pinch or two of flaky sea salt (I used Maldon, which was cheaper than I thought)
If your cashews are whole, cut them in smaller pieces (halves or quarters). 

Measure out the coconut and put the two ingredients in a dry pan over medium low heat. 

Toast the coconut and cashews just until the coconut starts to take on a golden color (left). Turn off the heat and let the pan sit on the stove while you chop and melt the chocolate...it will continue to darken (right) thanks to the residual heat in the pan, but you won't risk overdoing it this way. 

I've tried making these without toasting, and they were good, but definitely missing a little something. 
All hail the Chocolove! Thanks to their dark chocolate with sea salt and almonds and this 70% bar, it has become my favorite brand. 

Chop up the bar using a serrated knife and place it in a microwave-safe bowl, preferably glass. 

Place the bowl in the microwave and put it on 50 percent power for 45 seconds. Take it out and stir, then repeat this step until the chocolate is fully melted. As you get closer to being finished, reduce the time to 30 seconds. 

You can also melt the chocolate in a double boiler, I just find that I end up with less cleanup this way. Plus, I gotta use the microwave for something other than the cat's medicine :) 

Stir the coconut and cashews into the chocolate...try not to eat it all with a spoon...
...and then drop spoonfuls onto a cookie sheet lined with a silicone mat or a piece of parchment paper. I like to do more small clusters rather than fewer small ones. 

Let them cool for a few minutes, then sprinkle a few flakes of the salt on each one. 

Set the sheet in a cool area for a few hours to set up, or in the fridge to speed up the process. 

Enjoy one or two after dinner!